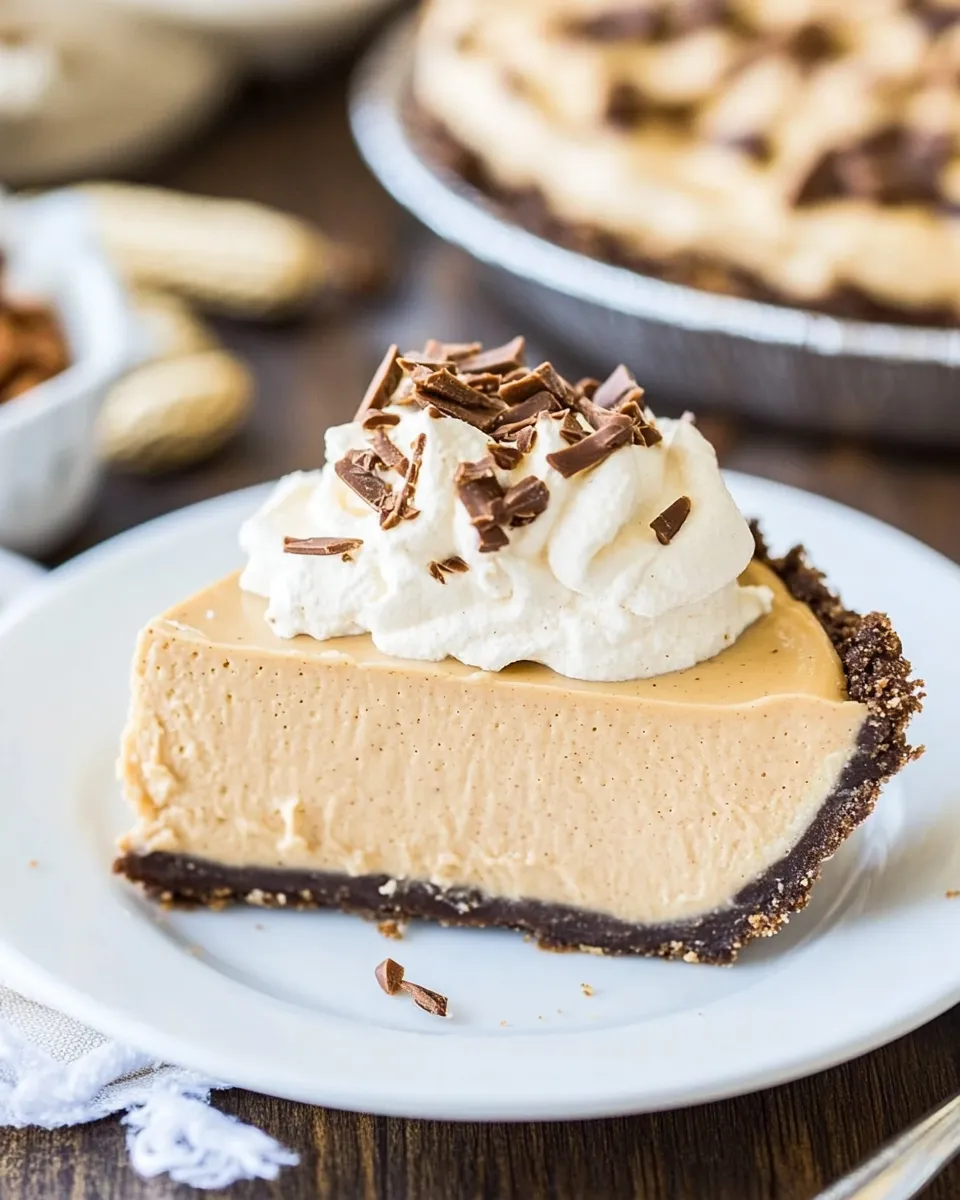
If you’re a fan of desserts that are rich yet light, then you’re in for a treat with this Lighter Peanut Butter Pie. This pie gives you all the creamy, dreamy goodness of classic peanut butter desserts without the guilt. It’s the perfect balance of sweet and savory, with a crust that crumbles and a filling that melts in your mouth. With a banana and a touch of SPLENDA, this pie is not only delicious but also a healthier alternative to traditional peanut butter pies. So, roll up your sleeves and let’s dive into this delightful creation!
Why It Works Every Time
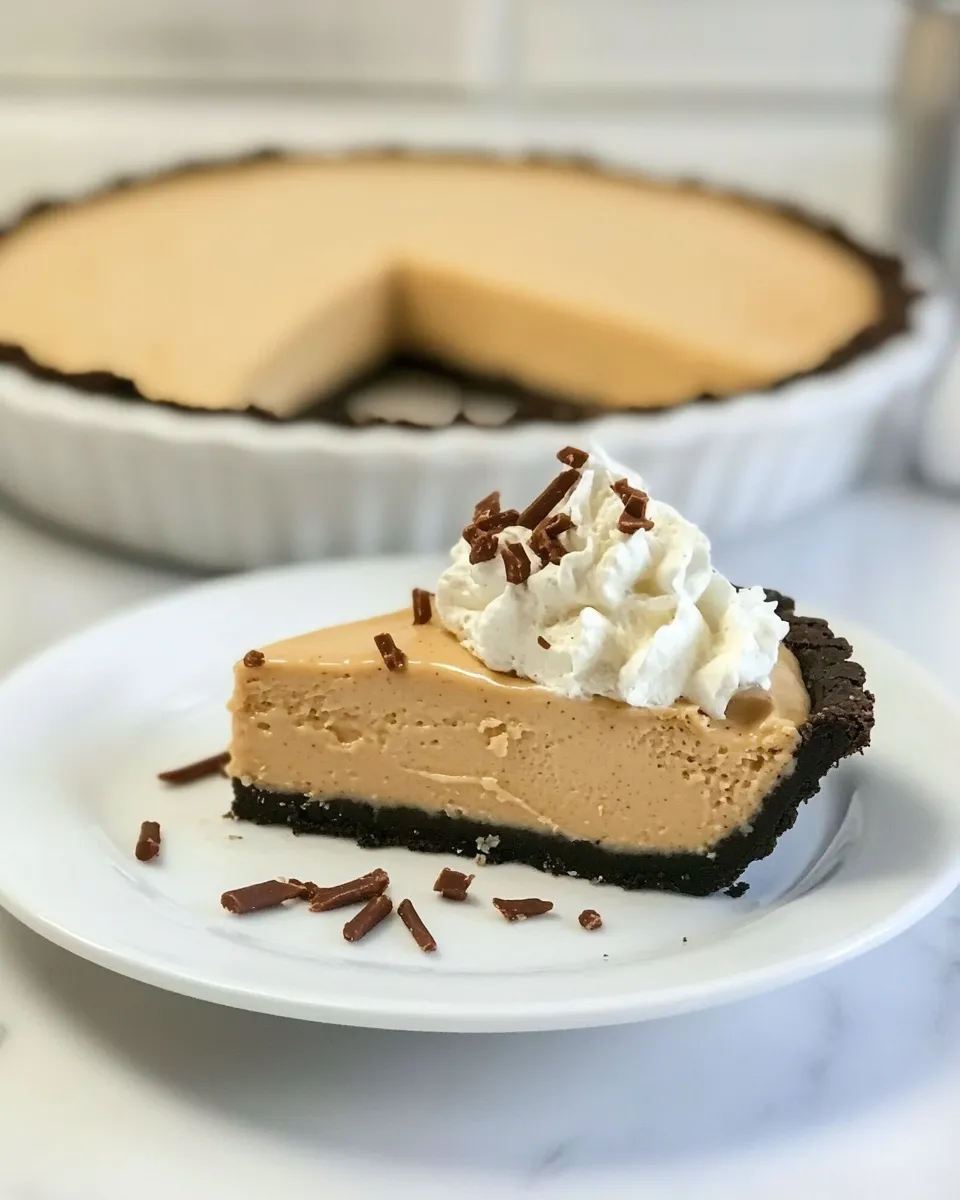
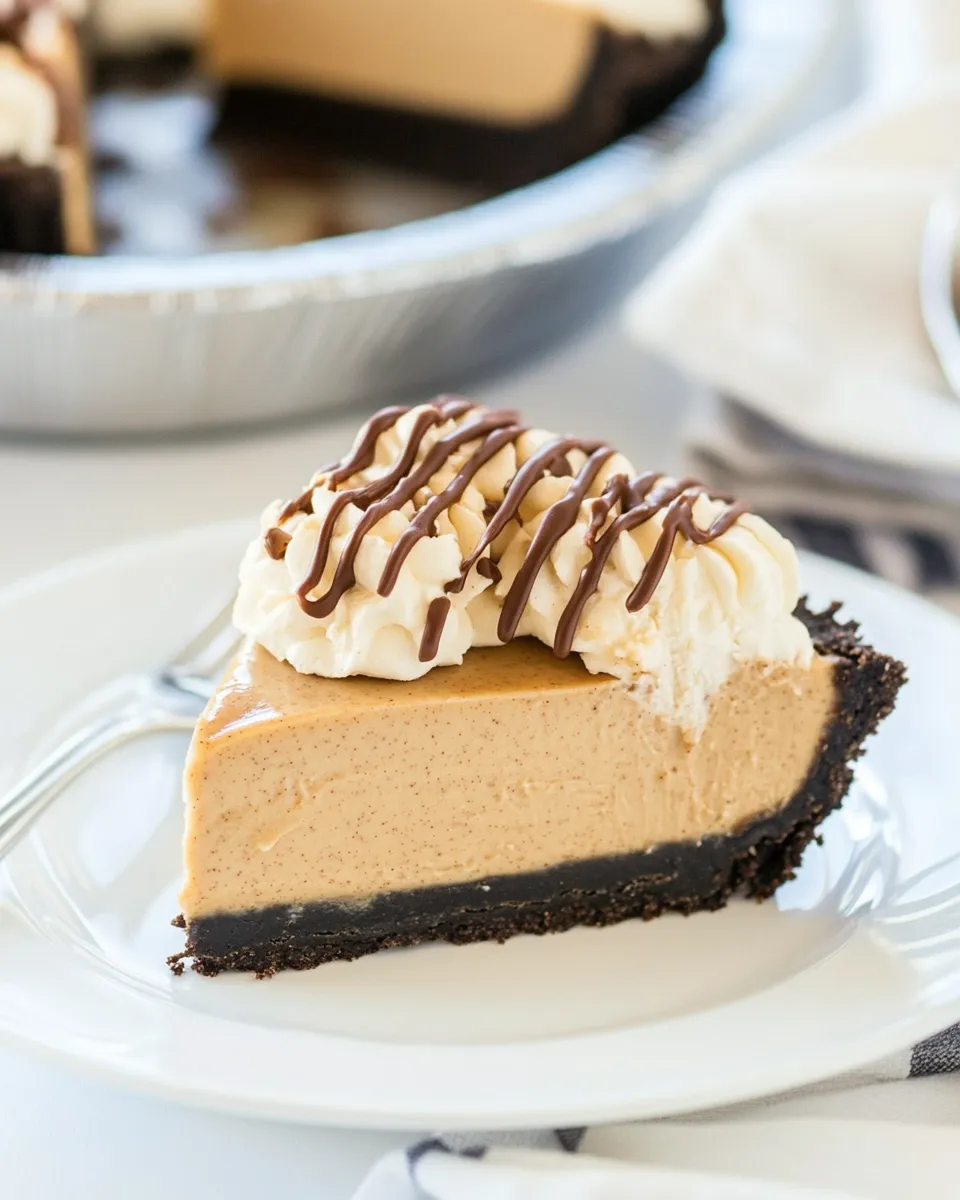
This Lighter Peanut Butter Pie is the ultimate showstopper for any gathering. The combination of reduced-fat cream cheese and natural peanut butter creates a luscious filling, while the chocolate graham cracker crust adds a touch of richness without overwhelming sweetness. Plus, using SPLENDA helps keep the calories down, making it a guilt-free indulgence. Each layer harmonizes perfectly, ensuring that every bite is as satisfying as the last.
The Ingredient Lineup
To make this Lighter Peanut Butter Pie, you’ll need the following ingredients:
- 1 3/4 cups chocolate graham cracker crumbs
- 1 tablespoon unsweetened cocoa powder
- 1/4 cup SPLENDA No Calorie Sweetener, Granulated
- 6 tablespoons butter, melted
- 6 ounces reduced-fat cream cheese, room temperature
- 1 cup natural peanut butter
- 1 ripe banana
- 1/3 cup SPLENDA No Calorie Sweetener, Granulated
- 1 (8-ounce) container sugar-free whipped topping
Cook’s Kit
Before you start whipping up this delicious pie, gather your kitchen essentials:
- Mixing Bowls: You’ll need a large bowl for mixing the filling and another for the crust.
- Measuring Cups and Spoons: Precision is key to achieving the right balance of flavors.
- 9-inch Pie Dish: A classic choice for assembling your pie.
- Electric Mixer: For achieving a creamy, lump-free filling.
- Spoon or Spatula: For spreading the filling evenly in the crust.
Lighter Peanut Butter Pie Made Stepwise
Step 1: Prepare the Crust
Start by preheating your oven to 350°F (175°C). In a mixing bowl, combine the chocolate graham cracker crumbs, cocoa powder, SPLENDA, and melted butter. Mix until everything is well combined and resembles wet sand. Press this mixture firmly into the bottom and up the sides of a 9-inch pie dish. Bake for 8-10 minutes, then let it cool completely.
Step 2: Make the Filling
In a large bowl, beat the reduced-fat cream cheese with an electric mixer until smooth. Add the natural peanut butter and the ripe banana, mixing until fully combined and creamy. Slowly incorporate the SPLENDA until the mixture is smooth and well blended.
Step 3: Fold in the Whipped Topping
Gently fold in the sugar-free whipped topping into the peanut butter mixture. Be careful not to deflate the whipped topping too much; you want to keep it light and airy.
Step 4: Assemble the Pie
Once the crust has cooled, pour the peanut butter filling into the prepared crust. Spread it evenly using a spatula. You can decorate the top with additional whipped topping or even some chopped peanuts if you desire.
Step 5: Chill and Serve
Cover the pie with plastic wrap and refrigerate for at least 4 hours, or overnight if possible. This allows the flavors to meld and the pie to set properly. When ready to serve, slice and enjoy!
Make It Diet-Friendly
If you’re looking to adapt this recipe for specific dietary needs or preferences, consider the following tips:
- Use a gluten-free chocolate graham cracker brand if you’re avoiding gluten.
- For a nut-free version, substitute the peanut butter with sunflower seed butter.
- For a vegan option, opt for vegan cream cheese and a plant-based whipped topping.
- Use a ripe avocado instead of banana for a different flavor and creamy texture.
What Not to Do
To ensure your Lighter Peanut Butter Pie turns out perfectly, keep these tips in mind:
- Don’t skip the chilling time; it’s essential for the pie to set properly.
- Avoid using regular whipped cream instead of the sugar-free version, as it can add unnecessary calories and sugar.
- Do not overmix the filling after adding the whipped topping, as this will deflate the mixture.
- Be careful not to burn the crust while baking; keep an eye on it as oven times can vary.
Storage & Reheat Guide
To enjoy your Lighter Peanut Butter Pie for days to come, consider the following storage tips:
The pie can be stored in the refrigerator for up to 5 days. Make sure to cover it well with plastic wrap or aluminum foil to keep it fresh. If you want to freeze it, wrap individual slices in plastic wrap and then place them in an airtight container. It will last for about 2 months in the freezer. When you’re ready to enjoy, simply thaw in the refrigerator overnight.
Popular Questions
Can I use natural peanut butter in this recipe?
Absolutely! Natural peanut butter works wonderfully in this Lighter Peanut Butter Pie, giving it a rich flavor while keeping it healthier.
What can I substitute for cream cheese?
If you prefer a dairy-free option, you can use vegan cream cheese or a blended silken tofu for a similar texture.
Is there a way to make this pie more chocolatey?
Yes! You can drizzle some melted dark chocolate over the top before refrigerating or mix in some mini chocolate chips into the filling.
Can I make this pie in advance?
Definitely! In fact, making it a day ahead allows the flavors to deepen and meld together beautifully.
If you’re looking for more quick and delicious recipes, check out these favorites:
Let’s Eat
This Lighter Peanut Butter Pie is not just a dessert; it’s an experience. The combination of flavors and textures will leave you wanting more, and the best part is that you can enjoy it without the guilt. So, gather your loved ones, slice up this delightful pie, and indulge in a moment of sweet bliss. Each bite is a reminder that lighter choices can still be incredibly satisfying. Enjoy your homemade dessert, and don’t forget to share the joy!
Lighter Peanut Butter Pie
Ingredients
Equipment
Method
- Step 1: Prepare the Crust: Preheat your oven to 350°F (175°C). In a mixing bowl, combine the chocolate graham cracker crumbs, cocoa powder, SPLENDA, and melted butter. Mix until everything is well combined and resembles wet sand. Press this mixture firmly into the bottom and up the sides of a 9-inch pie dish. Bake for 8-10 minutes, then let it cool completely.
- Step 2: Make the Filling: In a large bowl, beat the reduced-fat cream cheese with an electric mixer until smooth. Add the natural peanut butter and the ripe banana, mixing until fully combined and creamy. Slowly incorporate the SPLENDA until the mixture is smooth and well blended.
- Step 3: Fold in the Whipped Topping: Gently fold in the sugar-free whipped topping into the peanut butter mixture. Be careful not to deflate the whipped topping too much; you want to keep it light and airy.
- Step 4: Assemble the Pie: Once the crust has cooled, pour the peanut butter filling into the prepared crust. Spread it evenly using a spatula. You can decorate the top with additional whipped topping or even some chopped peanuts if you desire.
- Step 5: Chill and Serve: Cover the pie with plastic wrap and refrigerate for at least 4 hours, or overnight if possible. This allows the flavors to meld and the pie to set properly. When ready to serve, slice and enjoy!
Notes
- Ensure the pie is well covered while refrigerating to keep it fresh.
- For a nut-free version, substitute peanut butter with sunflower seed butter.
- Consider using a gluten-free graham cracker for a gluten-free option.