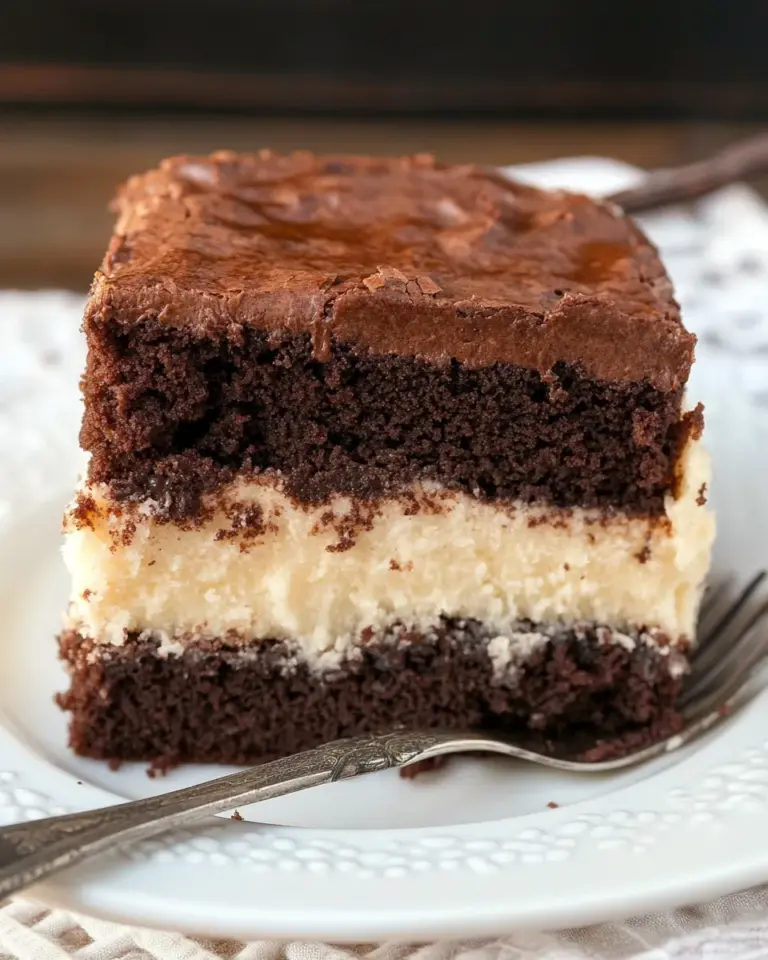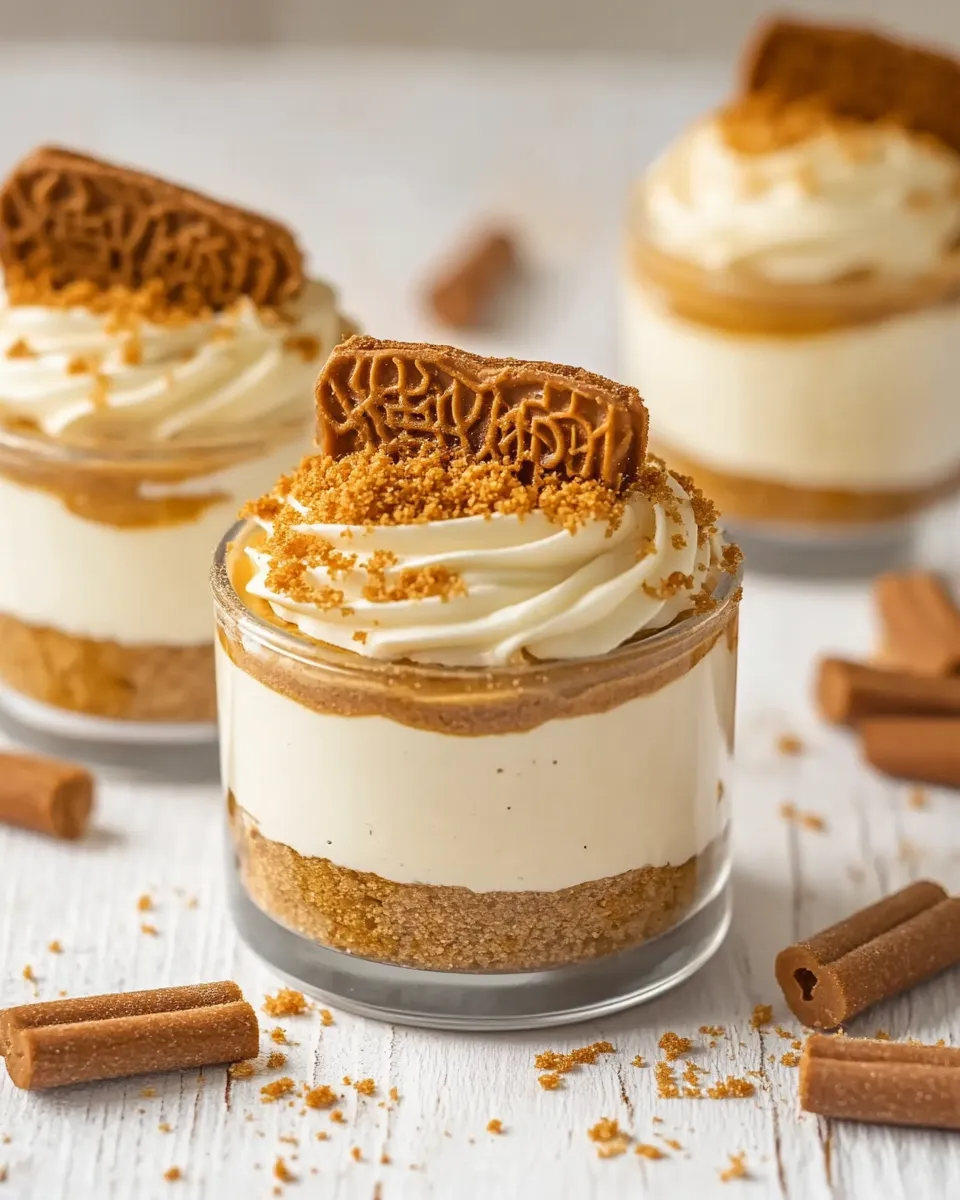
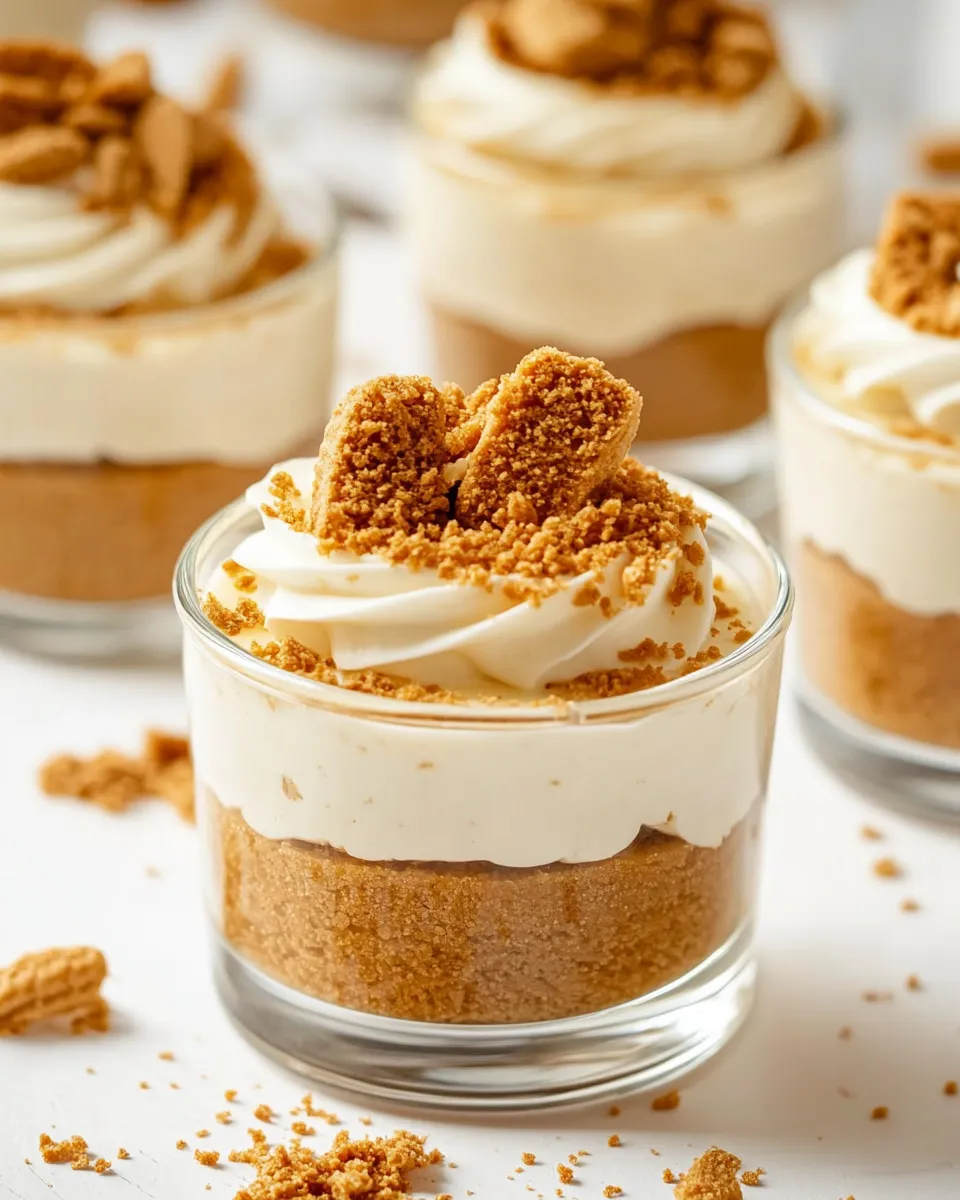
Imagine a dessert that combines the creamy richness of cheesecake with the caramelized flavor of Biscoff cookies. These No-Bake Biscoff Cheesecake Cups are the perfect treat for those warm days when you don’t want to heat up the kitchen. They are quick to prepare, require no baking, and are an absolute crowd-pleaser. Each bite is a delightful combination of a crunchy cookie crust, a velvety cheesecake filling, and a drizzle of smooth Biscoff spread. Let’s dive into this scrumptious recipe and impress your family and friends with these heavenly desserts!
What Sets This Recipe Apart
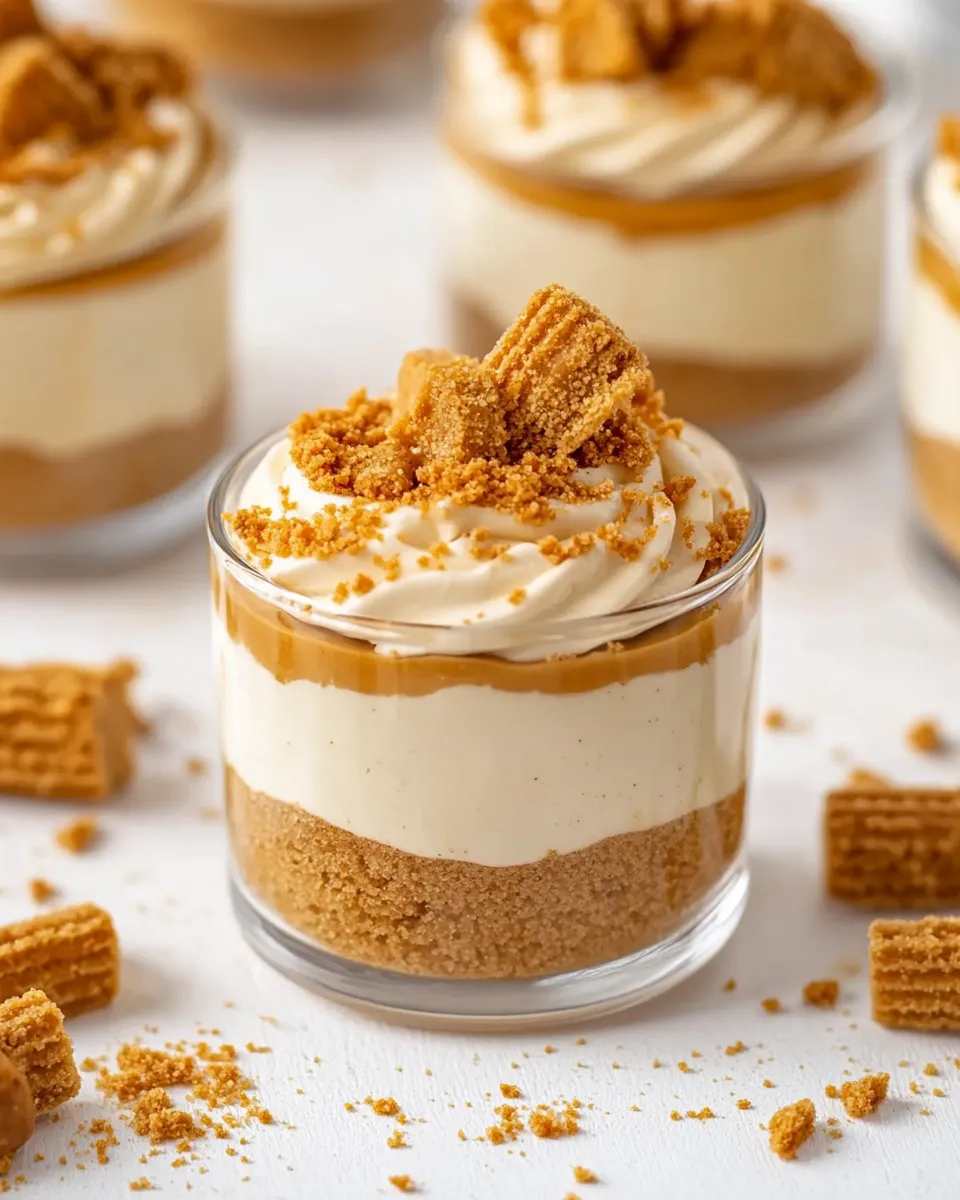
What makes these No-Bake Biscoff Cheesecake Cups stand out is their simplicity and the unique flavor profile of Biscoff cookies. The crunchiness of the cookie crust pairs beautifully with the creamy filling, and the extra layer of Biscoff spread on top adds an indulgent touch. Plus, they are perfectly portioned, making them ideal for any gathering or a cozy night in. The best part? They come together in just a few simple steps, allowing you to enjoy the sweet rewards without the hassle of baking.
Your Shopping Guide
To make these delicious No-Bake Biscoff Cheesecake Cups, here’s what you’ll need:
- 30 Lotus Biscoff biscuits
- 2 tablespoons unsalted butter, melted
- 16 oz heavy cream (2 cups)
- 8 oz cream cheese, at room temperature
- 1/2 cup powdered sugar
- 1 cup Biscoff spread
- 1 teaspoon vanilla extract
- 8 Biscoff cookies, cut in half for garnish
Make sure to grab everything fresh for the best flavor!
Before You Start: Equipment
Before you dive into the preparation, gather these essential tools:
- Mixing bowls – for combining ingredients.
- Electric mixer – for whipping cream and blending the cheesecake filling.
- Measuring cups and spoons – for accurate ingredient quantities.
- Cups or small jars – to serve the cheesecake cups.
- Spatula – for folding ingredients gently.
Having these tools ready will make your baking experience smooth and enjoyable!
No-Bake Biscoff Cheesecake Cups: Step-by-Step Guide
Step 1: Prepare the Cookie Crust
Start by crushing the 30 Biscoff biscuits into fine crumbs. You can do this using a food processor or by placing them in a zip-top bag and rolling over them with a rolling pin. Once crushed, combine the crumbs with the melted butter, mixing until the texture resembles wet sand.
Step 2: Assemble the Crust
Evenly distribute the cookie mixture into the bottom of your cups or jars, pressing down firmly to create a solid crust. Set aside while you prepare the filling.
Step 3: Make the Cheesecake Filling
In a large mixing bowl, beat the cream cheese with an electric mixer until smooth and creamy. Gradually add in the powdered sugar and mix until well combined. Then, add the Biscoff spread and vanilla extract, mixing until fully incorporated.
Step 4: Whip the Cream
In another bowl, whip the heavy cream until stiff peaks form. This step is crucial for achieving a light and airy texture in your cheesecake filling.
Step 5: Combine the Mixtures
Gently fold the whipped cream into the cream cheese mixture using a spatula. Be careful not to deflate the whipped cream; this will ensure your cheesecake filling is fluffy and delightful.
Step 6: Fill the Cups
Spoon the cheesecake filling over the prepared cookie crusts in your cups. Use a spatula to smooth the tops for a polished look.
Step 7: Chill the Cheesecake Cups
Cover the cups with plastic wrap and place them in the refrigerator. Allow them to chill for at least 4 hours, or overnight if you can resist the temptation!
Step 8: Garnish and Serve
Before serving, drizzle a bit of Biscoff spread on top of each cup and place half of a Biscoff cookie for garnish. This not only makes them look stunning but adds an extra crunch.
Seasonal Serving Ideas

These No-Bake Biscoff Cheesecake Cups are versatile and perfect for any occasion. Here are some seasonal ideas to elevate your serving:
- During the holidays, add a sprinkle of cinnamon or nutmeg on top for a festive touch.
- For summer gatherings, serve alongside fresh berries for a refreshing contrast.
- For a cozy autumn vibe, drizzle with caramel sauce and sprinkle with crushed nuts.
- In spring, decorate with edible flowers for a beautiful presentation.
Problems & Prevention
While making these No-Bake Biscoff Cheesecake Cups is relatively straightforward, here are some common problems and how to prevent them:
- If the crust is too crumbly, try adding a bit more melted butter to help it hold together.
- To avoid a grainy texture in your filling, ensure your cream cheese is at room temperature before mixing.
- If the whipped cream doesn’t hold its shape, check that your heavy cream is cold before whipping.
- For a smoother cheesecake, fold the whipped cream gently and avoid overmixing.
Store, Freeze & Reheat
For best results, follow these storage tips:
You can store your No-Bake Biscoff Cheesecake Cups in the refrigerator for up to 5 days. Ensure they are covered to prevent them from absorbing any odors. If you’d like to keep them longer, you can freeze the cheesecake cups. Just be sure to cover them tightly with plastic wrap. They can last for up to 2 months in the freezer. When ready to enjoy, let them thaw overnight in the refrigerator and serve cold.
Ask the Chef
Can I use other types of cookies for the crust?
Absolutely! While Biscoff cookies provide a unique flavor, you can use any cookie you love, such as Oreos or graham crackers, for a different twist.
What can I use instead of Biscoff spread?
If you can’t find Biscoff spread, you can substitute it with another cookie butter or even a nut butter for a different flavor profile.
How do I make this recipe dairy-free?
For a dairy-free version, use a dairy-free cream cheese alternative and coconut cream instead of heavy cream. Ensure all other ingredients are dairy-free as well.
Can I double the recipe?
Yes! You can easily double the ingredients to make more cheesecake cups. Just be sure to use a larger mixing bowl for the filling.
If you love these No-Bake Biscoff Cheesecake Cups, you might also enjoy:
Wrap-Up
These No-Bake Biscoff Cheesecake Cups are an indulgent treat that anyone can make, regardless of baking experience. With their delightful flavors and creamy texture, they are sure to impress at any gathering or simply for a sweet personal treat. Enjoy the process of making them, and don’t forget to share with those you love!
Whether you’re having a cozy night in or hosting a party, these No-Bake Biscoff Cheesecake Cups are a must-try. Dive into the deliciousness, savor every bite, and bask in the compliments from your friends and family! Happy baking!
No-Bake Biscoff Cheesecake Cups
Ingredients
Equipment
Method
- Start by crushing the 30 Biscoff biscuits into fine crumbs using a food processor or by rolling them in a bag.
- Combine the crumbs with the melted butter until the texture resembles wet sand.
- Evenly distribute the cookie mixture into the bottom of your cups or jars, pressing down firmly to create a solid crust.
- In a large mixing bowl, beat the cream cheese until smooth. Gradually add the powdered sugar, Biscoff spread, and vanilla extract, mixing until fully incorporated.
- In another bowl, whip the heavy cream until stiff peaks form.
- Gently fold the whipped cream into the cream cheese mixture using a spatula.
- Spoon the cheesecake filling over the cookie crusts in your cups and smooth the tops.
- Cover the cups and chill in the refrigerator for at least 4 hours or overnight.
- Before serving, drizzle Biscoff spread on top and garnish with half a Biscoff cookie.
Notes
- Store in the refrigerator for up to 5 days, covered.
- Freeze for up to 2 months, thaw overnight in the refrigerator before serving.
- For a different twist, try using Oreos or graham crackers for the crust.