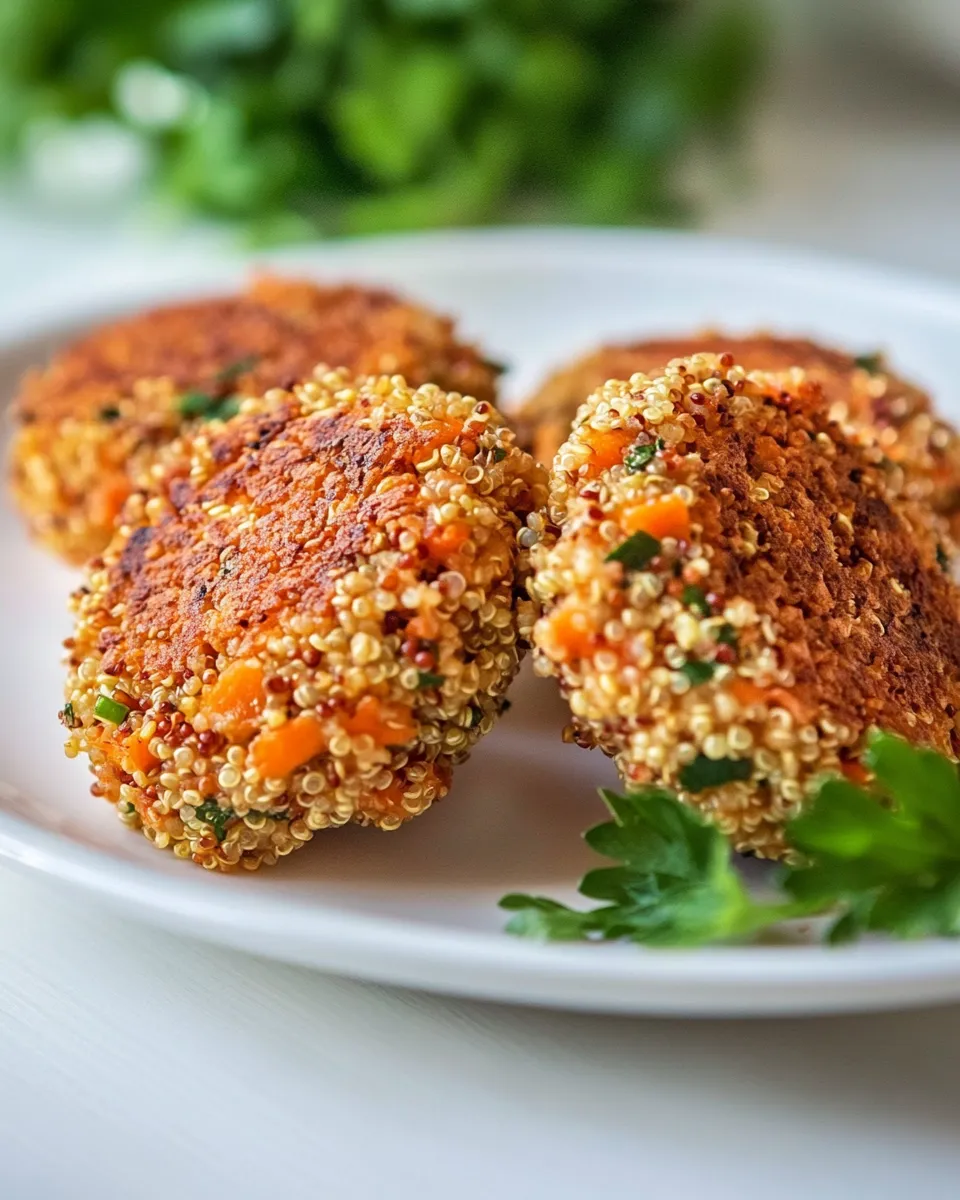
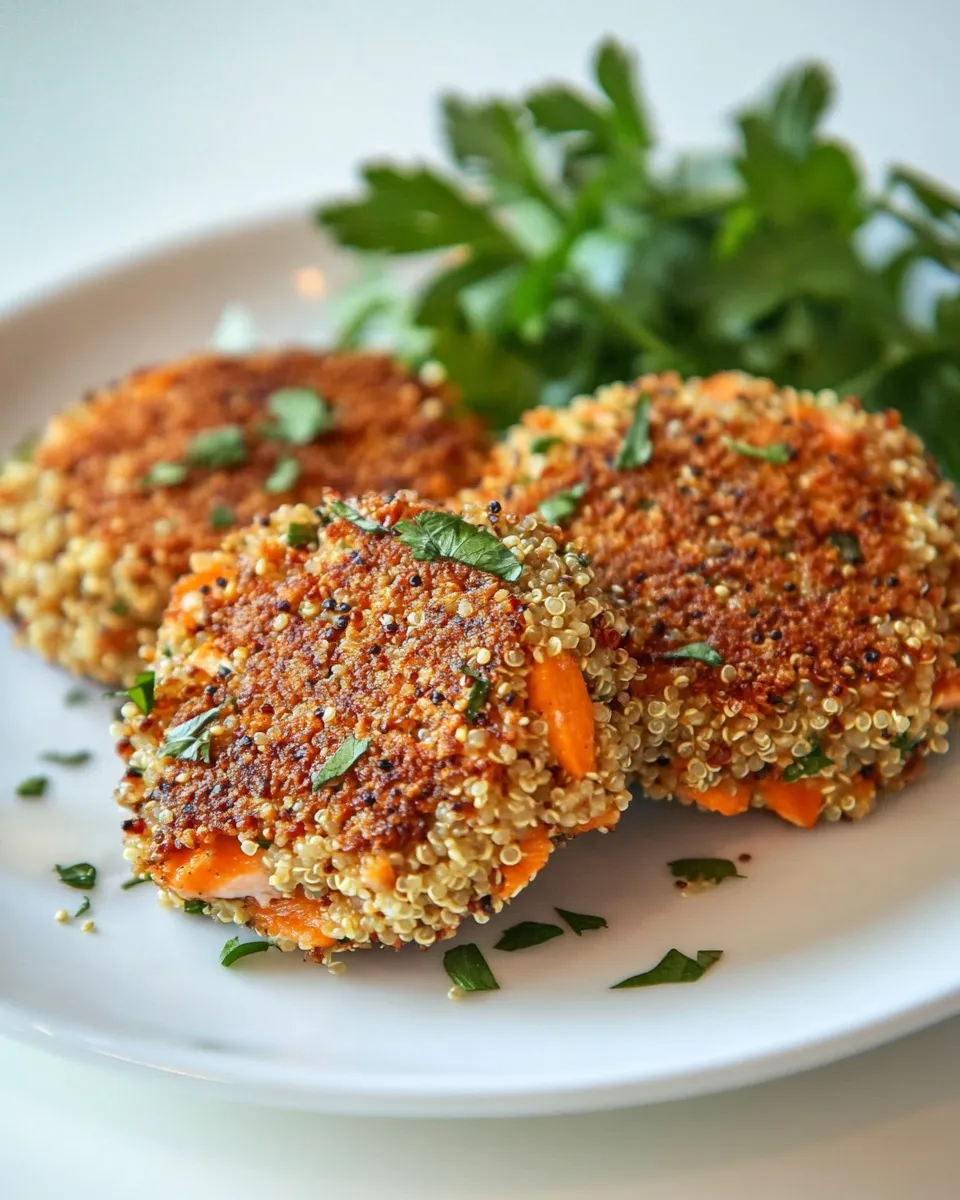
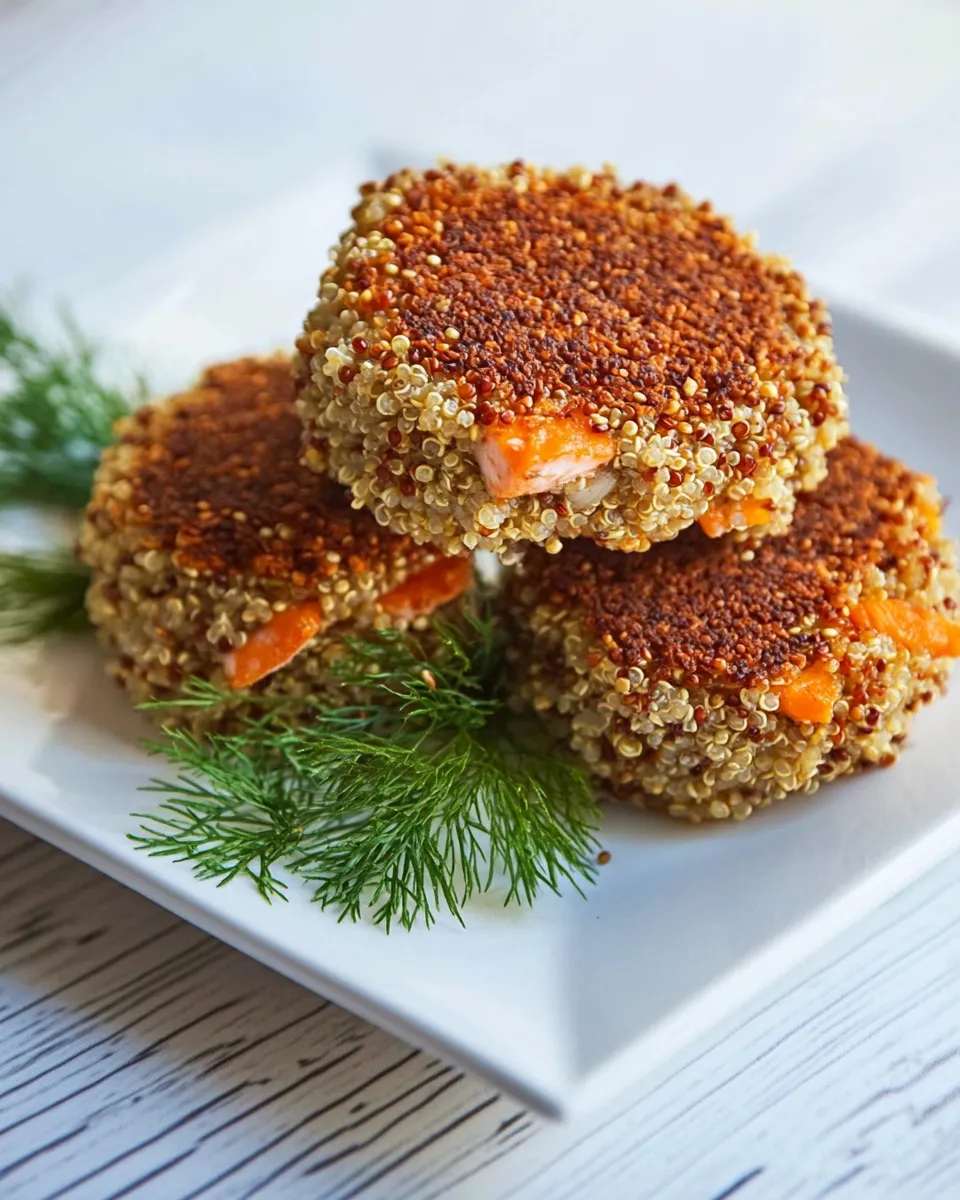
There’s something undeniably satisfying about a dish that combines wholesome ingredients into a delicious, crispy package. Salmon Quinoa Cakes are not only packed with flavor but are also incredibly nutritious, making them a perfect meal for any time of day. These cakes are great for lunch, dinner, or even as a snack. With the delightful combination of fresh salmon, protein-rich quinoa, and aromatic herbs, you’ll find yourself coming back for more. Plus, they are quick and easy to prepare, making them a great option for busy weeknights.
Why I Love This Recipe
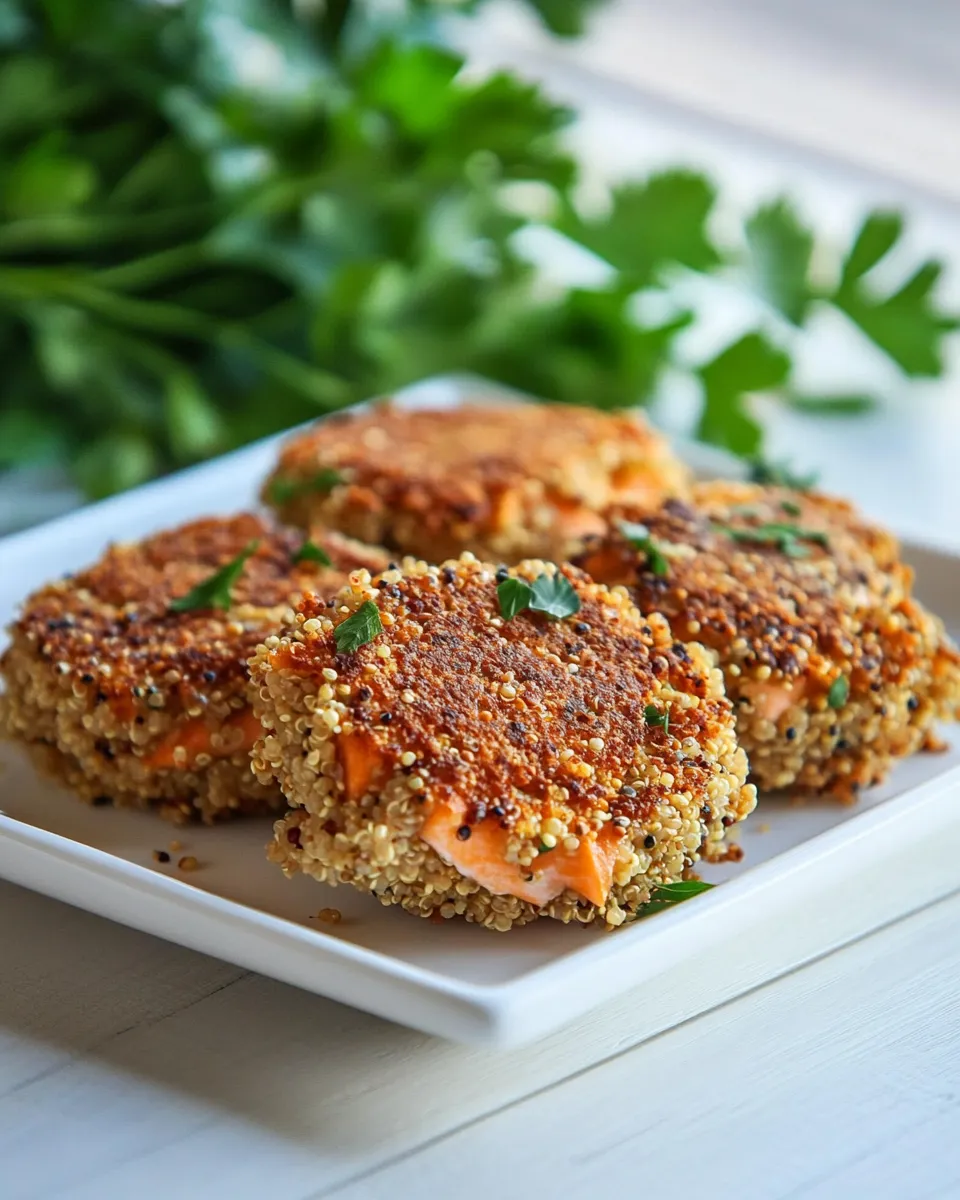
This recipe for Salmon Quinoa Cakes is a personal favorite because it checks all the boxes: it’s healthy, easy to make, and utterly delicious. The crispy exterior gives way to a tender, flavorful inside, making each bite a delightful experience. Plus, these cakes are versatile! You can serve them with a simple salad, nestled in a bun as a burger, or alongside your favorite dipping sauce. The freshness of the ingredients shines through, and the use of quinoa adds a nutty flavor and texture that perfectly complements the salmon.
What to Buy
To make these Salmon Quinoa Cakes, here’s what you’ll need:
- 1 tablespoon olive oil
- 1 pound salmon fillets, fresh, skin removed
- 1 1/2 cups quinoa, cooked
- 2 green onions, sliced
- 1/4 cup dill, fresh, chopped
- 1/4 cup Greek yogurt
- 1 egg
- 1 tablespoon lemon juice
- 1 teaspoon dijon mustard
- 1 teaspoon kosher salt
- 1/2 teaspoon black pepper
Make sure your salmon is fresh for the best flavor and texture. While buying quinoa, you might also want to explore the different varieties available; tri-color quinoa can add a lovely visual appeal to your cakes.
Appliances & Accessories
Here are a few kitchen tools that will make this recipe even easier:
- Mixing bowl: For combining all the ingredients.
- Skillet or frying pan: A non-stick skillet is ideal for frying the cakes.
- Spatula: To flip the cakes without breaking them.
- Measuring cups and spoons: Essential for accurate ingredient measurements.
- Food processor (optional): For chopping the salmon if you prefer a finer texture.
Having the right tools makes the cooking process smoother and more enjoyable.
Build Salmon Quinoa Cakes Step by Step
Step 1: Prepare the Ingredients
Start by cooking your quinoa according to package instructions. Once cooked, let it cool. While the quinoa is cooking, remove the skin from the salmon fillets and chop them into large chunks.
Step 2: Mix the Salmon
In a mixing bowl, combine the chopped salmon, cooked quinoa, sliced green onions, chopped dill, Greek yogurt, egg, lemon juice, dijon mustard, kosher salt, and black pepper. Use a fork or your hands to mix everything until well combined.
Step 3: Form the Cakes
With your hands, shape the mixture into patties, about 2-3 inches wide and 1 inch thick. You should get around 8 cakes from this mixture.
Step 4: Heat the Oil
In a skillet, heat the olive oil over medium heat. Make sure the oil is hot but not smoking; this ensures a crispy exterior.
Step 5: Cook the Cakes
Carefully place the salmon cakes in the skillet. Cook for about 4-5 minutes on each side or until they are golden brown and cooked through. You might need to do this in batches, depending on the size of your skillet.
Step 6: Serve and Enjoy
Once cooked, remove the cakes from the skillet and let them drain on paper towels for a moment. Serve them warm, perhaps with a squeeze of fresh lemon or a dollop of your favorite sauce.
Seasonal Adaptations
Depending on the season, you can adapt these Salmon Quinoa Cakes to incorporate different flavors:
- Spring: Add fresh herbs like parsley or chives for a lighter flavor.
- Summer: Serve with a refreshing quinoa salad with spinach, grapefruit, and avocado on the side.
- Fall: Mix in some finely chopped roasted pumpkin or sweet potato for a seasonal twist.
- Winter: Add spices like cumin or paprika for a warming flavor profile.
These adaptations ensure that your Salmon Quinoa Cakes remain exciting and fresh throughout the year.
Pitfalls & How to Prevent Them
When making Salmon Quinoa Cakes, here are a few common pitfalls to avoid:
- Too Wet: If your mixture is too wet, the cakes may fall apart. Make sure the quinoa is well-drained and not overly sticky.
- Overcrowding the Pan: Frying too many cakes at once can lower the temperature of the oil, leading to soggy cakes. Cook in batches for the best results.
- Not Enough Binding: Ensure you use the egg and Greek yogurt as they help bind the ingredients together. Skipping these can result in crumbly cakes.
- Undercooking: Always check that your cakes are cooked through by cutting one in half. They should be opaque inside.
By being mindful of these pitfalls, you can perfect your Salmon Quinoa Cakes every time.
Cooling, Storing & Rewarming
Should you have any leftover Salmon Quinoa Cakes, here’s how to handle them:
- Cooling: Allow the cakes to cool completely on a wire rack to prevent sogginess.
- Storing: Keep them in an airtight container in the refrigerator for up to 3 days.
- Rewarming: To reheat, place them in a skillet over medium heat for a few minutes on each side or in the oven at 350°F (175°C) until warmed through.
These steps will help maintain the texture and flavor of your cakes, making for a delicious snack or meal later on.
Handy Q&A
Can I use canned salmon instead of fresh salmon?
Yes, you can use canned salmon! Just make sure to drain it well and flake it before adding it to the mixture. This can save you time and is a great alternative.
What can I serve with Salmon Quinoa Cakes?
These cakes pair beautifully with a simple salad, a zesty yogurt sauce, or even tucked into a bun as a burger. You can also serve them alongside roasted vegetables or a light dip.
Can I freeze the Salmon Quinoa Cakes?
Absolutely! You can freeze uncooked cakes by placing them on a baking sheet in the freezer until firm, then transferring them to a freezer bag. They can be cooked from frozen; just add a few extra minutes to the cooking time.
Is there a substitute for quinoa?
If you’re looking for an alternative, cooked brown rice or even couscous can work well in this recipe. Just be aware that the texture and flavor will change slightly.
If you’re looking for more delicious recipes, check out these reader favorites:
These recipes are sure to inspire your next culinary adventure.
Final Bite
Salmon Quinoa Cakes are an incredible dish that combines the goodness of salmon and quinoa into a convenient, tasty format. With their crispy exterior and tender inside, they offer a delightful eating experience that is sure to please everyone at the table. Whether you’re enjoying them as a light lunch, a hearty dinner, or a snack, these cakes are versatile and wholesome. So gather your ingredients, follow the simple steps, and enjoy a meal that is not only good for you but also absolutely delicious!
Salmon Quinoa Cakes
Ingredients
Equipment
Method
- Start by cooking your quinoa according to package instructions. Once cooked, let it cool. While the quinoa is cooking, remove the skin from the salmon fillets and chop them into large chunks.
- In a mixing bowl, combine the chopped salmon, cooked quinoa, sliced green onions, chopped dill, Greek yogurt, egg, lemon juice, dijon mustard, kosher salt, and black pepper. Use a fork or your hands to mix everything until well combined.
- With your hands, shape the mixture into patties, about 2-3 inches wide and 1 inch thick. You should get around 8 cakes from this mixture.
- In a skillet, heat the olive oil over medium heat. Make sure the oil is hot but not smoking; this ensures a crispy exterior.
- Carefully place the salmon cakes in the skillet. Cook for about 4-5 minutes on each side or until they are golden brown and cooked through. You might need to do this in batches, depending on the size of your skillet.
- Once cooked, remove the cakes from the skillet and let them drain on paper towels for a moment. Serve them warm, perhaps with a squeeze of fresh lemon or a dollop of your favorite sauce.
Notes
- Ensure your salmon is fresh for the best flavor and texture.
- Cook the quinoa well and let it cool to prevent the cakes from becoming soggy.
- Store leftovers in an airtight container in the refrigerator for up to 3 days.