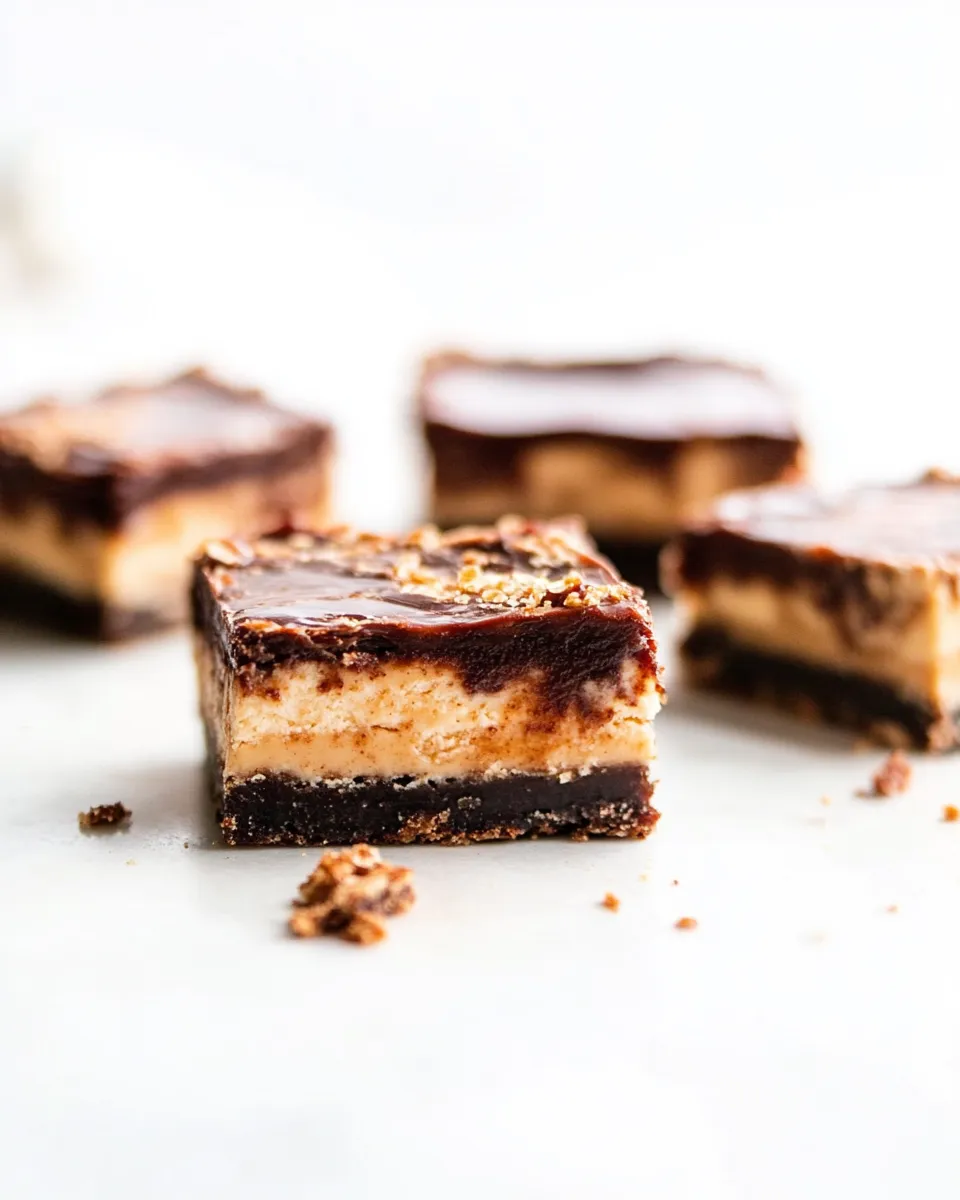
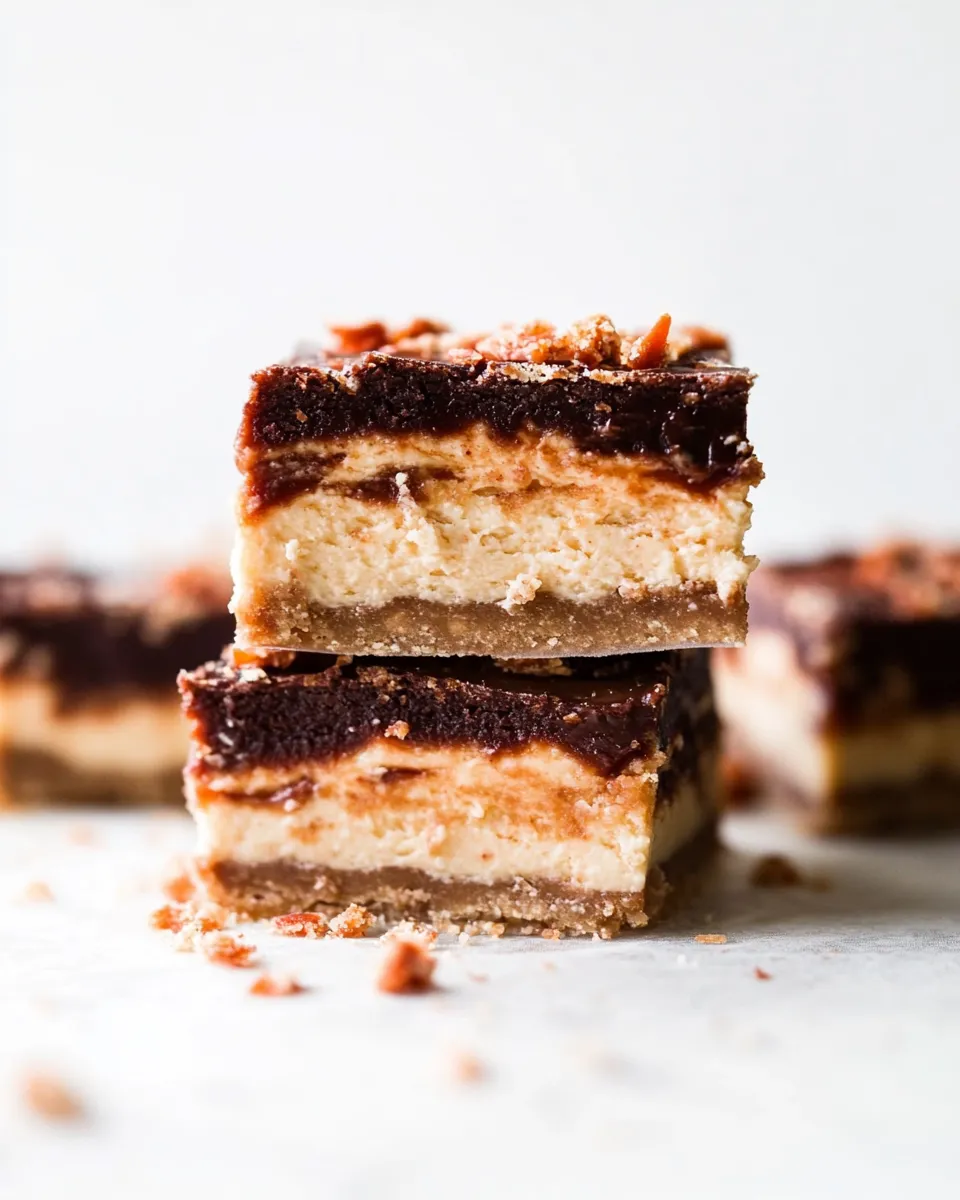
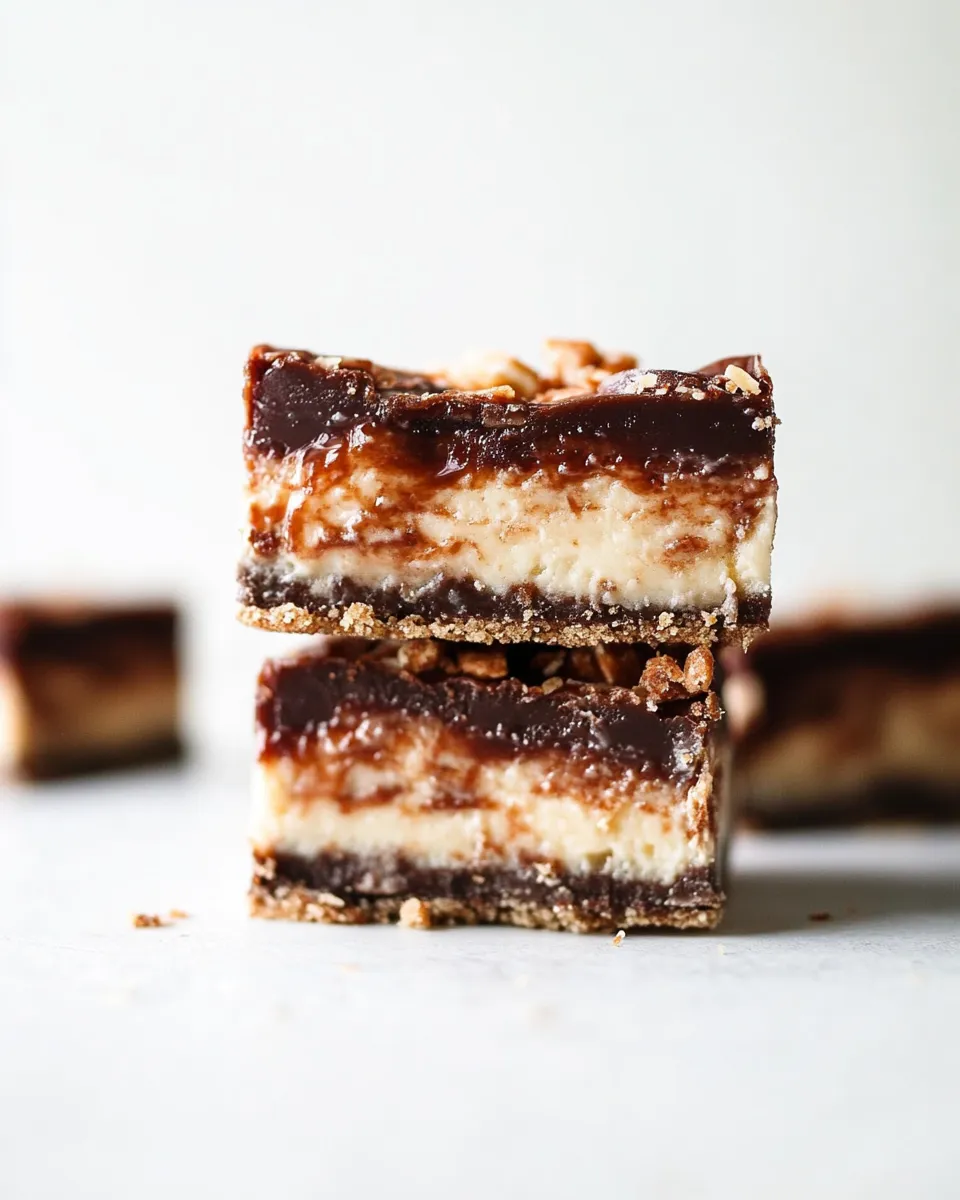
Indulging in dessert doesn’t have to be a complicated affair, and these Butterfinger Nutter Butter Cheesecake Bars are the perfect testament to that. With a crunchy Nutter Butter crust, rich and creamy cheesecake filling, and the delightful crunch of Butterfinger candy bars, these bars are a treat for every occasion. Whether you’re hosting a gathering or simply craving something sweet, this recipe is sure to satisfy your sweet tooth.
Why It’s My Go-To
These Butterfinger Nutter Butter Cheesecake Bars have quickly become a staple in my dessert repertoire. The combination of creamy cheesecake and crunchy candy is simply irresistible. Plus, they are easy to make and can be prepared in advance, making them perfect for anything from a cozy night in to a festive celebration. Each bite is a delightful explosion of flavor, and the Nutter Butter base gives it a unique twist that sets it apart from traditional cheesecake bars.
What We’re Using
To create these delectable cheesecake bars, we’ll need the following ingredients:
- 16 whole Nutter Butter cookies – This will form the base of our cheesecake bars, adding that perfect nutty flavor.
- 1/4 cup butter, melted – Helps bind the cookie crust together.
- 8 oz cream cheese, softened – The star of our cheesecake filling, providing creaminess and richness.
- 1/3 cup sugar – For sweetness that balances the rich flavors.
- 1 teaspoon vanilla extract – Adds depth and enhances the overall flavor.
- 1 egg – Helps to set the cheesecake filling.
- 1/2 tablespoon all-purpose flour – Aids in thickening the filling.
- 6 fun-size Butterfinger chocolate bars – Chopped for a delicious crunch and flavor.
- 3/4 cup semi-sweet chocolate chips – For drizzling over the top, adding an extra layer of chocolatey goodness.
- 3 tablespoons butter – Used to melt the chocolate chips for the drizzle.
Before You Start: Equipment
Before diving into the recipe, gather the following equipment:
- 9×9 inch baking pan – Perfect size for these cheesecake bars.
- Parchment paper – To line the baking pan for easy removal.
- Mixing bowl – For blending the cheesecake filling.
- Electric mixer – Makes it easier to achieve a smooth filling.
- Spatula – Useful for spreading the filling evenly.
- Double boiler or microwave-safe bowl – For melting chocolate.
Mastering Butterfinger Nutter Butter Cheesecake Bars: How-To
Creating these delicious Butterfinger Nutter Butter Cheesecake Bars is a straightforward process. Follow these simple steps:
Step 1: Preheat the oven
Preheat your oven to 350°F (175°C). This ensures that your cheesecake bars bake evenly.
Step 2: Prepare the crust
In a mixing bowl, crush the 16 Nutter Butter cookies into fine crumbs. You can use a food processor or simply place them in a zip-top bag and crush them with a rolling pin. Once crushed, combine the cookie crumbs with the melted butter until well mixed.
Step 3: Press the crust into the pan
Line your 9×9 inch baking pan with parchment paper for easy removal. Press the Nutter Butter mixture firmly into the bottom of the pan to create an even layer. Bake the crust in the preheated oven for about 10 minutes, or until it’s set and slightly golden.
Step 4: Make the cheesecake filling
In a mixing bowl, beat the softened cream cheese until smooth. Add in the sugar and continue to mix until well combined. Add the vanilla extract and egg, mixing until just incorporated. Finally, sprinkle in the flour and mix until you achieve a smooth batter.
Step 5: Fold in the Butterfinger
Chop the 6 fun-size Butterfinger bars into small pieces. Gently fold the chopped Butterfinger into the cheesecake filling, ensuring even distribution.
Step 6: Pour the filling over the crust
Once the crust has cooled slightly, pour the cheesecake filling over the crust, spreading it evenly with a spatula.
Step 7: Bake the cheesecake bars
Bake in the oven for 25-30 minutes, or until the edges are set and the center has a slight jiggle. The cheesecake will firm up as it cools.
Step 8: Prepare the chocolate drizzle
While the cheesecake is baking, melt the 3/4 cup of semi-sweet chocolate chips with 3 tablespoons of butter using a double boiler or microwave. Stir until smooth.
Step 9: Cool and drizzle
Once the cheesecake bars are done baking, allow them to cool completely in the pan. Once cooled, drizzle the melted chocolate over the top. You can also add some extra chopped Butterfinger on top for decoration.
Step 10: Chill before serving
Refrigerate the cheesecake bars for at least 2 hours before slicing. This helps the flavors meld together and makes cutting easier.
Ingredient Swaps & Substitutions
If you’re looking to switch things up or accommodate dietary preferences, consider these swaps:
- Gluten-free option: Use gluten-free Nutter Butter cookies for the crust.
- Low-fat version: Substitute reduced-fat cream cheese for regular cream cheese.
- Vegan option: Use a vegan cream cheese alternative and a flax egg instead of a regular egg.
- Nut-free option: Choose a nut-free cookie for the crust to avoid allergens.
Steer Clear of These
When making Butterfinger Nutter Butter Cheesecake Bars, avoid the following:
- Using cold cream cheese – Ensure it’s softened to achieve a smooth filling.
- Overbaking – Keep an eye on the cheesecake to prevent it from cracking or becoming dry.
- Skipping the chilling step – Chilling is essential for the bars to set properly.
- Inconsistent cookie crumbles – Make sure the cookie crumbs are uniform for an even crust.
Best Ways to Store
To keep your Butterfinger Nutter Butter Cheesecake Bars fresh and delicious, follow these storage tips:
- Store in an airtight container in the refrigerator for up to 5 days.
- For longer storage, wrap individual bars in plastic wrap and freeze for up to 3 months.
- Thaw frozen bars in the refrigerator overnight before serving.
Troubleshooting Q&A
What should I do if my cheesecake bars crack?
If your cheesecake bars crack, it may be due to overbaking. Make sure to bake until just set, and allow them to cool gradually to prevent cracking.
Can I use a different type of candy instead of Butterfinger?
Absolutely! You can substitute with your favorite candy bars, like Snickers or Reese’s, for a different flavor profile.
How do I know when the cheesecake is done baking?
The cheesecake is done when the edges are set but the center still has a slight jiggle. It will firm up as it cools.
Why is my cheesecake filling not smooth?
If your filling isn’t smooth, it’s likely due to cold cream cheese or not mixing it thoroughly. Ensure the cream cheese is at room temperature and mix until creamy.
If you’re a fan of delicious desserts, check out these recipes:
The Takeaway
These Butterfinger Nutter Butter Cheesecake Bars are a delightful combination of flavors and textures that are sure to please anyone with a sweet tooth. The crunchy Nutter Butter crust perfectly complements the creamy filling, while the Butterfinger adds a fun and nostalgic touch. They are simple to prepare and can be made in advance, making them a great option for any occasion. Whether you’re enjoying them at a party or just as an after-dinner treat, these bars are sure to become a favorite in your dessert rotation. So, roll up your sleeves and get ready to enjoy a slice (or two) of this heavenly treat!
Butterfinger Nutter Butter Cheesecake Bars
Ingredients
Equipment
Method
- Preheat your oven to 350°F (175°C).
- In a mixing bowl, crush the 16 Nutter Butter cookies into fine crumbs and mix with the melted butter.
- Line your 9x9 inch baking pan with parchment paper and press the cookie mixture into the bottom of the pan.
- Bake the crust for about 10 minutes, or until it’s set and slightly golden.
- In a mixing bowl, beat the softened cream cheese until smooth, then add sugar, vanilla extract, and egg, mixing until well combined. Sprinkle in the flour and mix until smooth.
- Fold in the chopped Butterfinger bars into the cheesecake filling.
- Pour the cheesecake filling over the cooled crust, spreading it evenly.
- Bake for 25-30 minutes, or until the edges are set and the center has a slight jiggle.
- While baking, melt the chocolate chips with butter until smooth.
- Once cooled, drizzle the melted chocolate over the cheesecake bars and refrigerate for at least 2 hours before slicing.
Notes
- Use gluten-free cookies for a gluten-free option.
- Substitute reduced-fat cream cheese for a lower-fat version.
- Chill the bars to enhance flavor and texture.