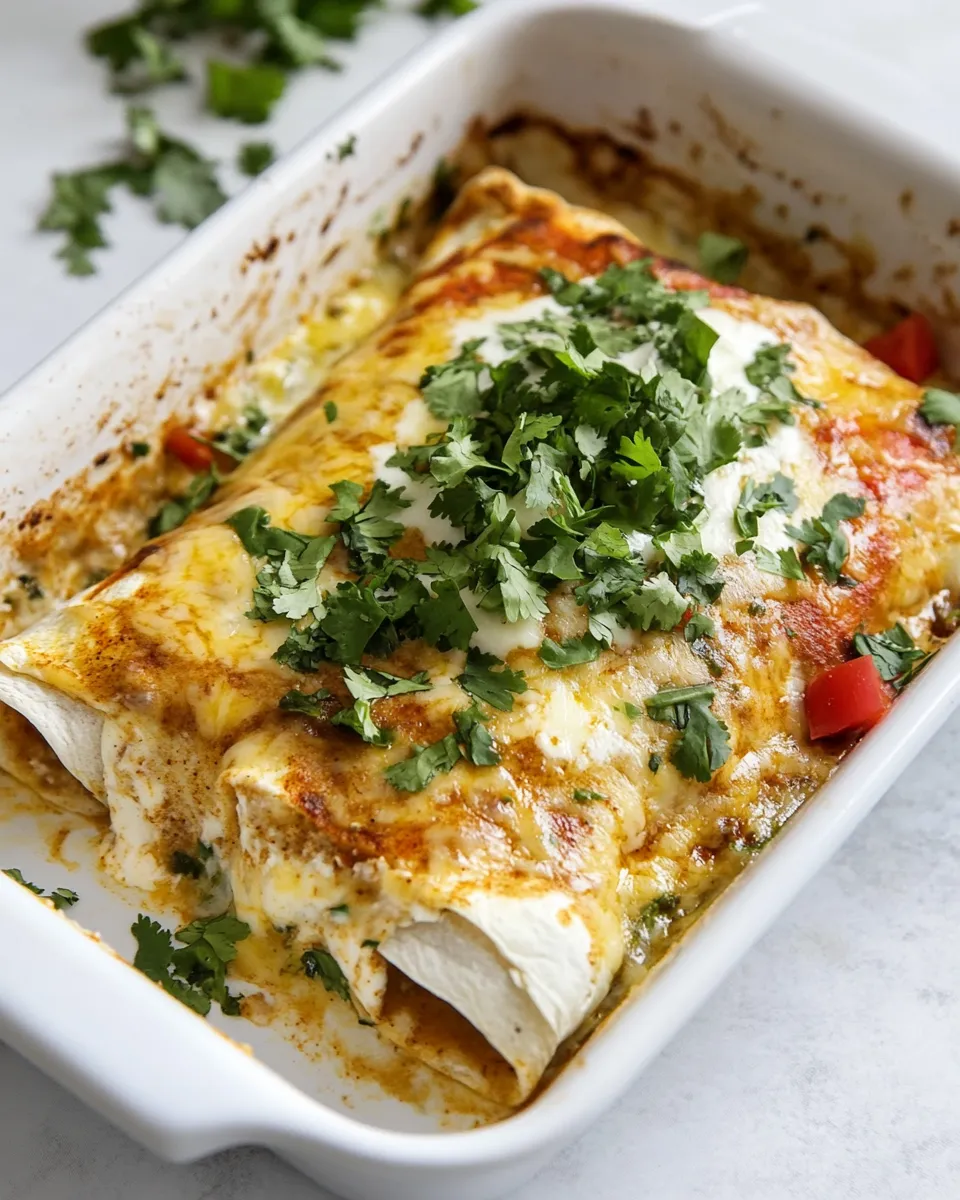
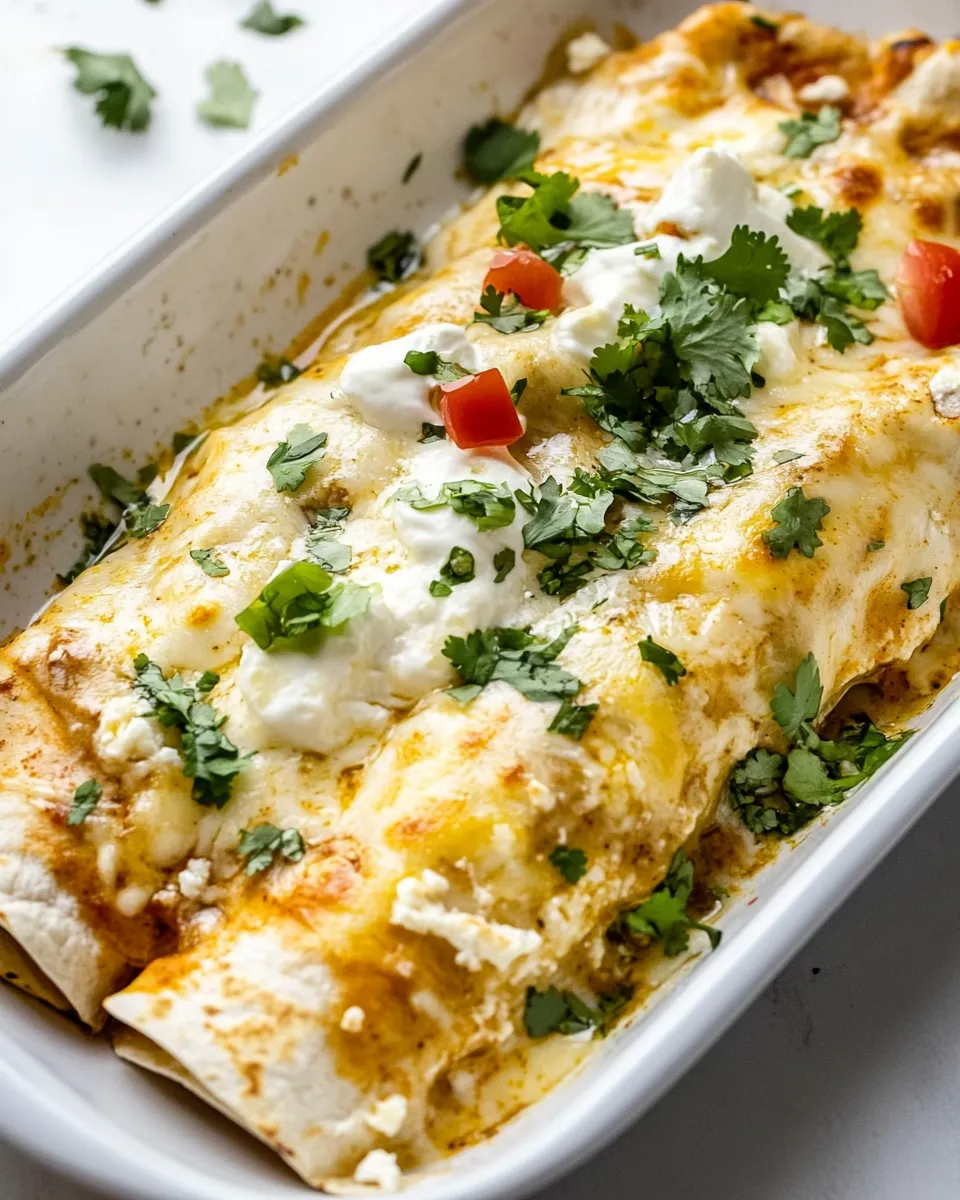
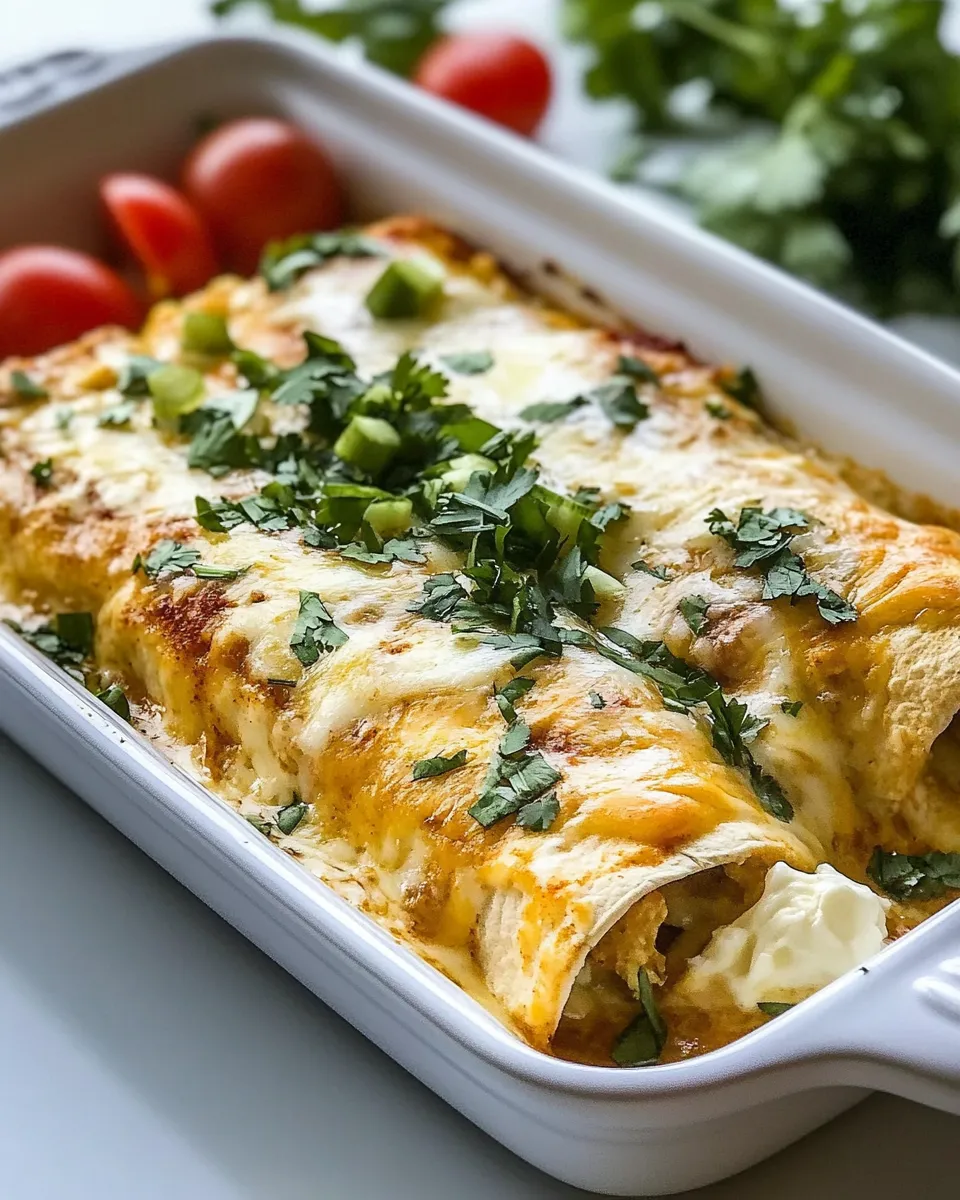
If you’re looking for a comforting and creamy spin on a classic dish, look no further than these delicious Cream Cheese Enchiladas. This recipe is a delightful combination of flavors and textures that will impress your family and friends. The creamy filling, made with smooth cream cheese and tender chicken, is enveloped in soft tortillas and topped with zesty green enchilada sauce and melted cheese. Perfect for a cozy dinner or a crowd-pleasing party dish, these enchiladas are sure to become a staple in your kitchen.
Why You’ll Love This Recipe
These Cream Cheese Enchiladas offer a unique twist on traditional enchiladas, providing a rich and creamy filling that’s hard to resist. The combination of cream cheese, green chiles, and shredded chicken creates a flavor profile that is both comforting and satisfying. Plus, the green enchilada sauce adds a tangy kick that perfectly complements the creamy filling. They are easy to assemble, can be made ahead of time, and are perfect for meal prep. Whether you’re feeding a hungry family or hosting a dinner party, these enchiladas are sure to be a hit!
Shopping List
- 8 ounces cream cheese, room temperature
- 4-ounce can fire-roasted green chiles
- 1 cup Mexican blend shredded cheese, divided
- 1 cup shredded Colby jack cheese, divided
- 1 teaspoon salt
- 1 teaspoon pepper
- 1 teaspoon garlic powder
- 2 teaspoons cumin
- ½ cup lime juice
- 2 cups shredded cooked chicken
- 2 cups green enchilada sauce
- 12 flour tortillas (6-inch)
Hardware & Gadgets
- Mixing bowl – For combining the creamy filling.
- 9×13 inch baking dish – Perfect for baking the enchiladas.
- Spatula – For spreading the filling and sauce.
- Measuring cups and spoons – Essential for precise ingredient measurements.
- Foil – To cover the dish while baking, keeping the enchiladas moist.
Cream Cheese Enchiladas Cooking Guide
Step 1: Prepare the Filling
In a large mixing bowl, combine the room temperature cream cheese, fire-roasted green chiles, ½ cup of the Mexican blend shredded cheese, ½ cup of shredded Colby jack cheese, salt, pepper, garlic powder, cumin, lime juice, and shredded cooked chicken. Mix until well combined and creamy.
Step 2: Prepare the Tortillas
Warm the flour tortillas in a microwave or on a skillet for a few seconds to make them more pliable. This will help prevent them from tearing when you fill them.
Step 3: Assemble the Enchiladas
Spread a generous amount of the cream cheese filling onto each tortilla. Roll them tightly and place them seam-side down in a greased 9×13 inch baking dish. Repeat until all the tortillas are filled and arranged in the dish.
Step 4: Add the Sauce and Cheese
Pour the green enchilada sauce evenly over the assembled enchiladas. Sprinkle the remaining Mexican blend cheese and Colby jack cheese on top.
Step 5: Bake the Enchiladas
Cover the baking dish with foil and bake in a preheated oven at 350°F (175°C) for 20 minutes. Remove the foil and bake for an additional 10-15 minutes or until the cheese is bubbly and slightly golden.
Step 6: Serve and Enjoy
Once baked, remove from the oven and let cool for a few minutes before serving. These Cream Cheese Enchiladas can be garnished with fresh cilantro, sliced avocado, or a dollop of sour cream if desired. Enjoy your delicious meal!
Substitutions by Diet
- For a vegetarian option, you can replace the shredded chicken with black beans or sautéed vegetables.
- If you’re lactose intolerant, consider using dairy-free cream cheese and plant-based cheese alternatives.
- For a lower-carb option, use cauliflower tortillas instead of flour tortillas.
- To make it spicier, add diced jalapeños or use spicy green enchilada sauce.
Steer Clear of These
- Do not use low-fat cream cheese in this recipe, as it may not yield the same creamy texture.
- Avoid using flour tortillas that are too thick, as they can overpower the flavors of the filling.
- Skip overly sweet or flavored green enchilada sauces, as they can interfere with the savory profile of the dish.
Best Ways to Store
If you have leftovers, store them in an airtight container in the refrigerator for up to 3 days. To reheat, simply pop them in the microwave or oven until heated through. You can also freeze the unbaked enchiladas. Just assemble them in the baking dish, cover tightly with foil, and freeze for up to 3 months. When ready to bake, thaw in the refrigerator overnight and bake as directed.
Cream Cheese Enchiladas FAQs
Can I make Cream Cheese Enchiladas ahead of time?
Absolutely! You can assemble the enchiladas and cover them with sauce and cheese, then refrigerate them for up to 24 hours before baking. Just increase the baking time slightly if they are cold from the fridge.
What can I serve with Cream Cheese Enchiladas?
These enchiladas pair wonderfully with a refreshing salad, Mexican rice, or refried beans. You can also serve them with chips and guacamole on the side.
Can I use different types of cheese?
Yes! Feel free to mix and match your favorite cheeses. Monterey Jack, Pepper Jack, or even a sharp cheddar can work beautifully in this recipe.
How do I know when the enchiladas are done baking?
They’re done when the cheese is melted and bubbly, and the edges of the tortillas are slightly golden. You can also check to see if the filling is hot throughout by inserting a knife into the center.
Keep Cooking
- Ground Beef Enchilada Casserole With Corn Tortillas
- Creamy Chicken Enchilada Pasta Skillet
- Creamy Spinach Artichoke Chicken Stuffed Shells
Next Steps
Now that you have the recipe for these Cream Cheese Enchiladas, it’s time to gather your ingredients and get cooking! Your taste buds will thank you for this creamy, cheesy delight that’s sure to be a favorite at your dinner table. Whether you stick to the classic version or customize it to your liking, these enchiladas will undoubtedly bring smiles and satisfaction to everyone who tries them. Enjoy your cooking journey!
Share on Pinterest

Cream Cheese Enchiladas
Ingredients
Equipment
Method
- In a large mixing bowl, combine the room temperature cream cheese, fire-roasted green chiles, ½ cup of the Mexican blend shredded cheese, ½ cup of shredded Colby jack cheese, salt, pepper, garlic powder, cumin, lime juice, and shredded cooked chicken. Mix until well combined and creamy.
- Warm the flour tortillas in a microwave or on a skillet for a few seconds to make them more pliable.
- Spread a generous amount of the cream cheese filling onto each tortilla. Roll them tightly and place them seam-side down in a greased 9x13 inch baking dish.
- Pour the green enchilada sauce evenly over the assembled enchiladas. Sprinkle the remaining Mexican blend cheese and Colby jack cheese on top.
- Cover the baking dish with foil and bake in a preheated oven at 350°F (175°C) for 20 minutes. Remove the foil and bake for an additional 10-15 minutes or until the cheese is bubbly and slightly golden.
- Once baked, remove from the oven and let cool for a few minutes before serving. Garnish with fresh cilantro, sliced avocado, or a dollop of sour cream if desired.
Notes
- Store leftovers in an airtight container in the refrigerator for up to 3 days.
- You can freeze the unbaked enchiladas for up to 3 months.
- Feel free to customize with your favorite cheeses.