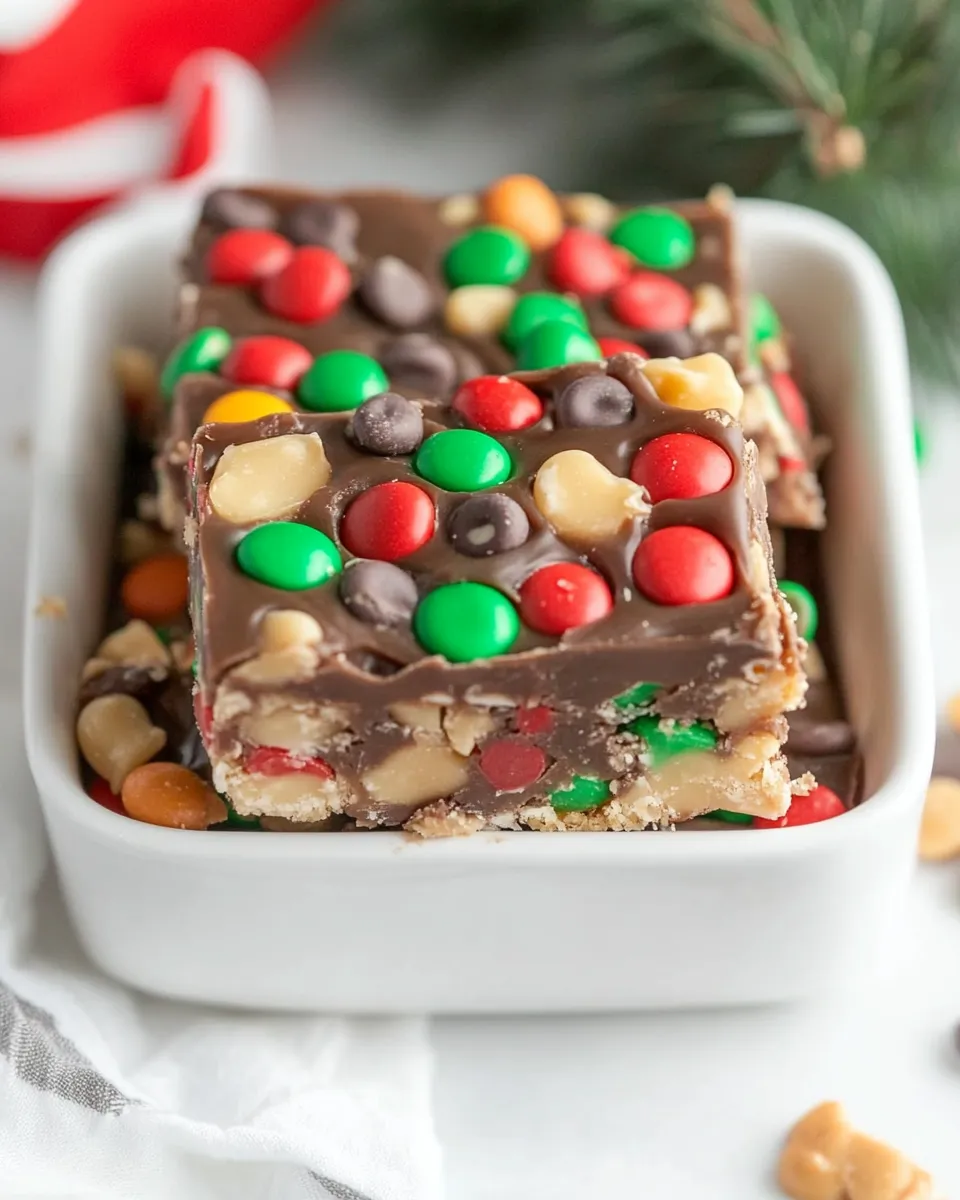
If you’re on the hunt for a sweet treat that’s sure to win over friends and family, look no further than these delightful Candy Topped Toffee Squares. The buttery, chewy base, combined with a rich layer of candy on top, creates a dessert that’s irresistible. These squares are perfect for any occasion, whether you’re hosting a holiday gathering or simply indulging your sweet tooth at home. With a handful of simple ingredients, you’ll be on your way to baking these delicious delights in no time.
Why It’s Crowd-Pleasing

Candy Topped Toffee Squares are the kind of dessert that appeals to a wide range of tastes. The combination of buttery toffee flavor with a sweet, crunchy topping makes these squares a favorite among kids and adults alike. They are incredibly easy to make, and the versatility of the toppings means you can customize them to fit any preference. Whether you prefer chocolate, nuts, or a medley of colorful candies, these squares can be tailored to your liking. Plus, they are perfect for sharing, making them a go-to option for potlucks, bake sales, or just a cozy night in.
Shopping List
- 1 cup (2 sticks) butter, at room temperature
- 1 cup dark brown sugar
- 1 egg yolk
- 1 teaspoon vanilla extract
- A dash of salt
- 2 cups all-purpose flour
- Candy toppings (your choice: chocolate chips, nuts, M&M’s, etc.)
Prep & Cook Tools
- Mixing bowls – For combining ingredients.
- Measuring cups and spoons – Accurate measurements ensure perfect results.
- Baking pan – A 9×13 inch pan works best for this recipe.
- Spatula – Ideal for spreading batter and toppings evenly.
- Oven – Preheat to 350°F (175°C) before starting.
Step-by-Step: Candy Topped Toffee Squares

1. Preheat the Oven
Begin by preheating your oven to 350°F (175°C). This ensures that your Candy Topped Toffee Squares will bake evenly.
2. Prepare the Baking Pan
Grease a 9×13 inch baking pan with a little butter or line it with parchment paper for easy removal.
3. Cream the Butter and Sugar
In a large mixing bowl, combine 1 cup of softened butter and 1 cup of dark brown sugar. Use an electric mixer to beat the mixture until it is light and fluffy, about 3-5 minutes.
4. Add the Egg Yolk and Vanilla
Add in 1 egg yolk and 1 teaspoon of vanilla extract. Beat until well combined, scraping down the sides of the bowl as needed.
5. Mix in the Dry Ingredients
In a separate bowl, whisk together 2 cups of all-purpose flour and a dash of salt. Gradually add this mixture to the butter mixture, stirring until just combined.
6. Spread the Batter in the Pan
Using a spatula, spread the batter evenly into the prepared baking pan. Make sure it’s smoothed out to the edges for even baking.
7. Bake the Base
Place the pan in the preheated oven and bake for about 20-25 minutes, or until the edges are golden brown. The center may look a bit soft; that’s perfect!
8. Add the Candy Topping
As soon as you take the pan out of the oven, sprinkle your choice of candy toppings over the warm toffee base. This could include chocolate chips, nuts, or colorful candies. The heat will melt the candies slightly, allowing them to stick to the squares.
9. Cool and Cut
Allow the Candy Topped Toffee Squares to cool completely in the pan. Once cooled, cut them into squares and enjoy!
Dietary Swaps & Alternatives

- For a dairy-free version, substitute the butter with a plant-based alternative.
- Use coconut sugar in place of dark brown sugar for a less processed option.
- If you’re looking to make these gluten-free, substitute all-purpose flour with a gluten-free blend.
Cook’s Commentary
These Candy Topped Toffee Squares are incredibly versatile, making them perfect for any season or celebration. You can experiment with different types of candies based on what you have on hand or what’s in season. If you’re a fan of robust flavors, consider adding a sprinkle of sea salt on top of the melted chocolate for a delightful sweet-salty contrast. For an exciting twist, try adding a drizzle of caramel sauce or peanut butter on top of the candy layer.
Storing Tips & Timelines
Once your Candy Topped Toffee Squares are cut, store them in an airtight container at room temperature for up to one week. If you want to keep them longer, they can be frozen for up to three months. Just ensure you place parchment paper between layers to prevent sticking. When you’re ready to enjoy them again, simply thaw at room temperature or pop them in the microwave for a few seconds to soften up the toffee.
Top Questions & Answers
Can I use different types of candies for the topping?
Absolutely! Feel free to use chocolate chips, crushed nuts, M&M’s, or any candy you enjoy. Just make sure they complement the toffee flavor.
What should I do if my toffee squares are too crumbly?
If your Candy Topped Toffee Squares are crumbly, it may be due to under-mixing or not enough moisture. Make sure to thoroughly mix the butter and sugar until fluffy and incorporate all the flour evenly.
Can I make these squares ahead of time?
Yes! These squares can be made a few days in advance. Just store them in an airtight container to keep them fresh.
How do I know when the squares are done baking?
The edges should be golden brown, and the center may still look slightly soft. It will firm up as it cools.
Ready to Cook?
Now that you have all the details, it’s time to roll up your sleeves and make these Candy Topped Toffee Squares! With their rich flavors and delightful textures, they are sure to become a favorite in your household. This sweet creation is not just a treat; it’s an experience that brings joy to everyone who takes a bite. So gather your ingredients, grab your baking tools, and start creating a dessert that will leave everyone asking for seconds!
Candy Topped Toffee Squares
Ingredients
Equipment
Method
- Begin by preheating your oven to 350°F (175°C). This ensures that your Candy Topped Toffee Squares will bake evenly.
- Grease a 9x13 inch baking pan with a little butter or line it with parchment paper for easy removal.
- In a large mixing bowl, combine 1 cup of softened butter and 1 cup of dark brown sugar. Use an electric mixer to beat the mixture until it is light and fluffy, about 3-5 minutes.
- Add in 1 egg yolk and 1 teaspoon of vanilla extract. Beat until well combined, scraping down the sides of the bowl as needed.
- In a separate bowl, whisk together 2 cups of all-purpose flour and a dash of salt. Gradually add this mixture to the butter mixture, stirring until just combined.
- Using a spatula, spread the batter evenly into the prepared baking pan. Make sure it's smoothed out to the edges for even baking.
- Place the pan in the preheated oven and bake for about 20-25 minutes, or until the edges are golden brown. The center may look a bit soft; that’s perfect!
- As soon as you take the pan out of the oven, sprinkle your choice of candy toppings over the warm toffee base. This could include chocolate chips, nuts, or colorful candies. The heat will melt the candies slightly, allowing them to stick to the squares.
- Allow the Candy Topped Toffee Squares to cool completely in the pan. Once cooled, cut them into squares and enjoy!
Notes
- For a dairy-free version, substitute the butter with a plant-based alternative.
- Use coconut sugar in place of dark brown sugar for a less processed option.
- If you're looking to make these gluten-free, substitute all-purpose flour with a gluten-free blend.