If you’re looking for a delicious, colorful, and nutritious meal, look no further than Chicken Stuffed Peppers with White Beans. This dish is a delightful combination of tender bell peppers loaded with a savory filling of shredded chicken, white beans, and aromatic spices. Perfect for a weeknight dinner or meal prep, these stuffed peppers are not only satisfying but also packed with protein and fiber. Let’s dive into this vibrant recipe that will make your taste buds dance!
Why It Works Every Time
Chicken Stuffed Peppers with White Beans is a winning combination for several reasons. First and foremost, it utilizes simple, wholesome ingredients that are easy to find. The bell peppers add a crunchy texture and a sweet flavor that perfectly complements the hearty filling. The addition of white beans not only enhances the dish’s nutritional profile but also gives it a creamy texture without the need for excessive dairy. Plus, the spices bring everything together, making it an explosion of flavor with every bite.
Ingredient Notes
- Olive Oil: Used for sautéing the onion and garlic, giving a wonderful depth of flavor.
- Onion: Adds sweetness and aromatic qualities, making the filling more robust.
- Garlic: Fresh garlic enhances the dish with its bold flavor.
- Red Bell Pepper: Minced and incorporated into the filling, it adds sweetness and color.
- Cilantro or Parsley: Fresh herbs brighten the dish and add a touch of freshness.
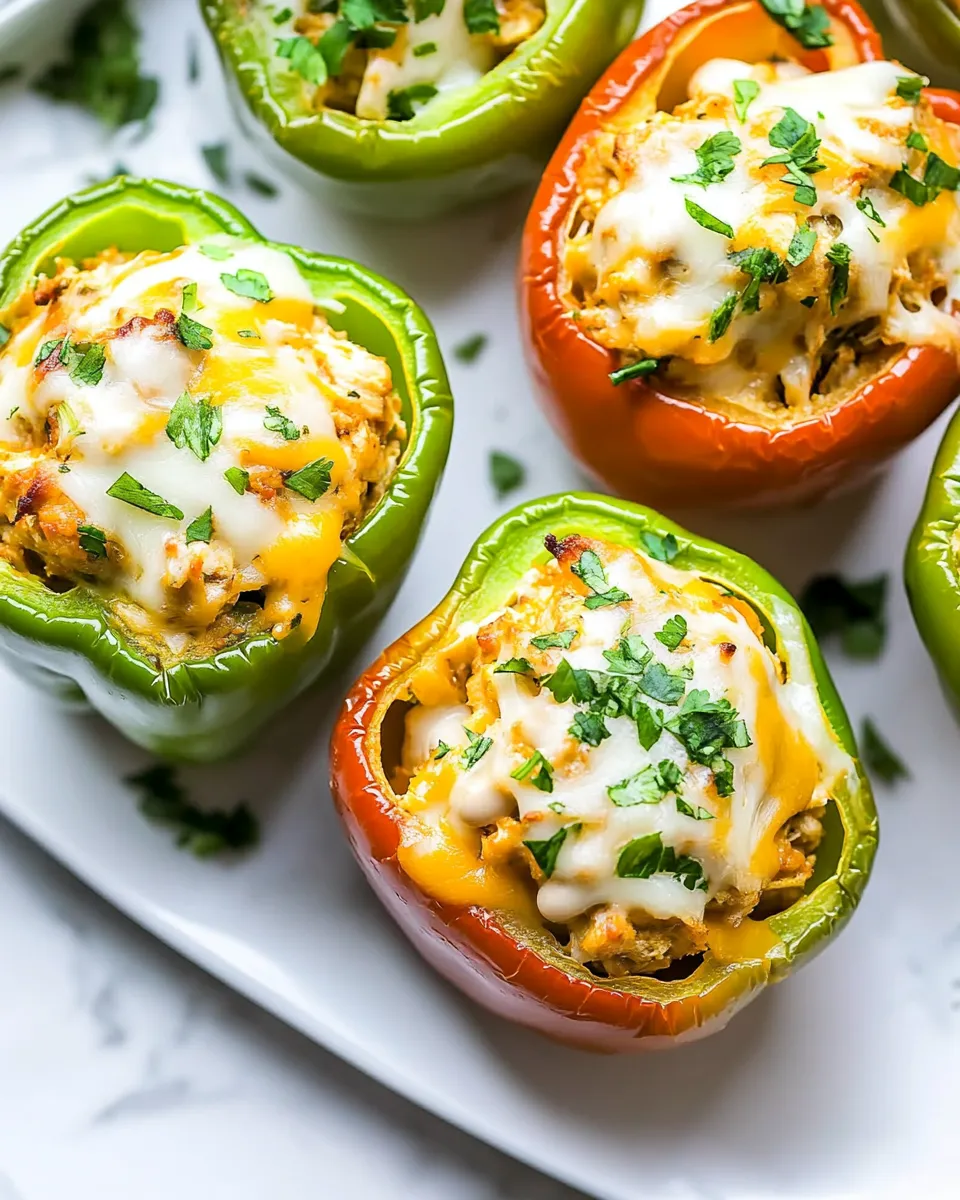
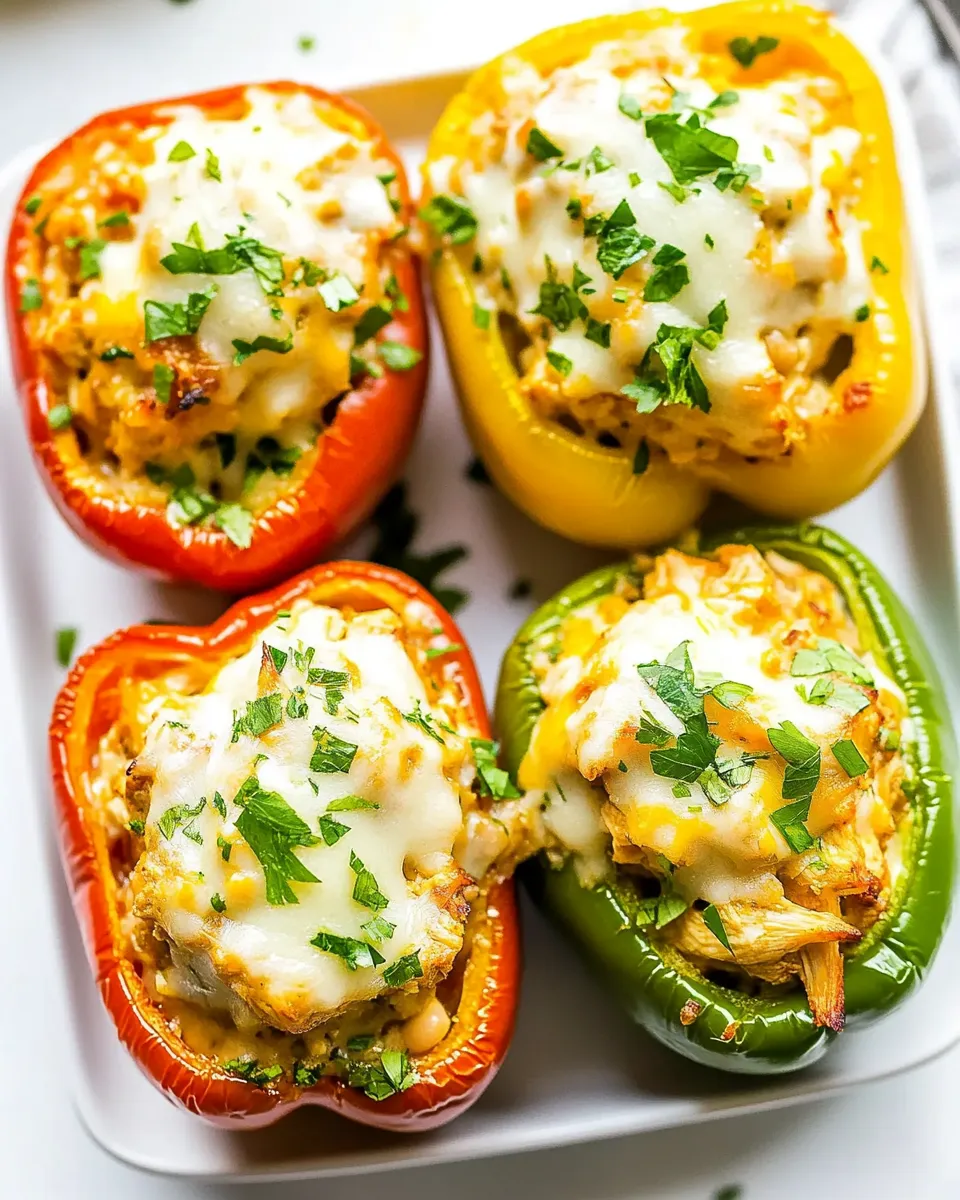
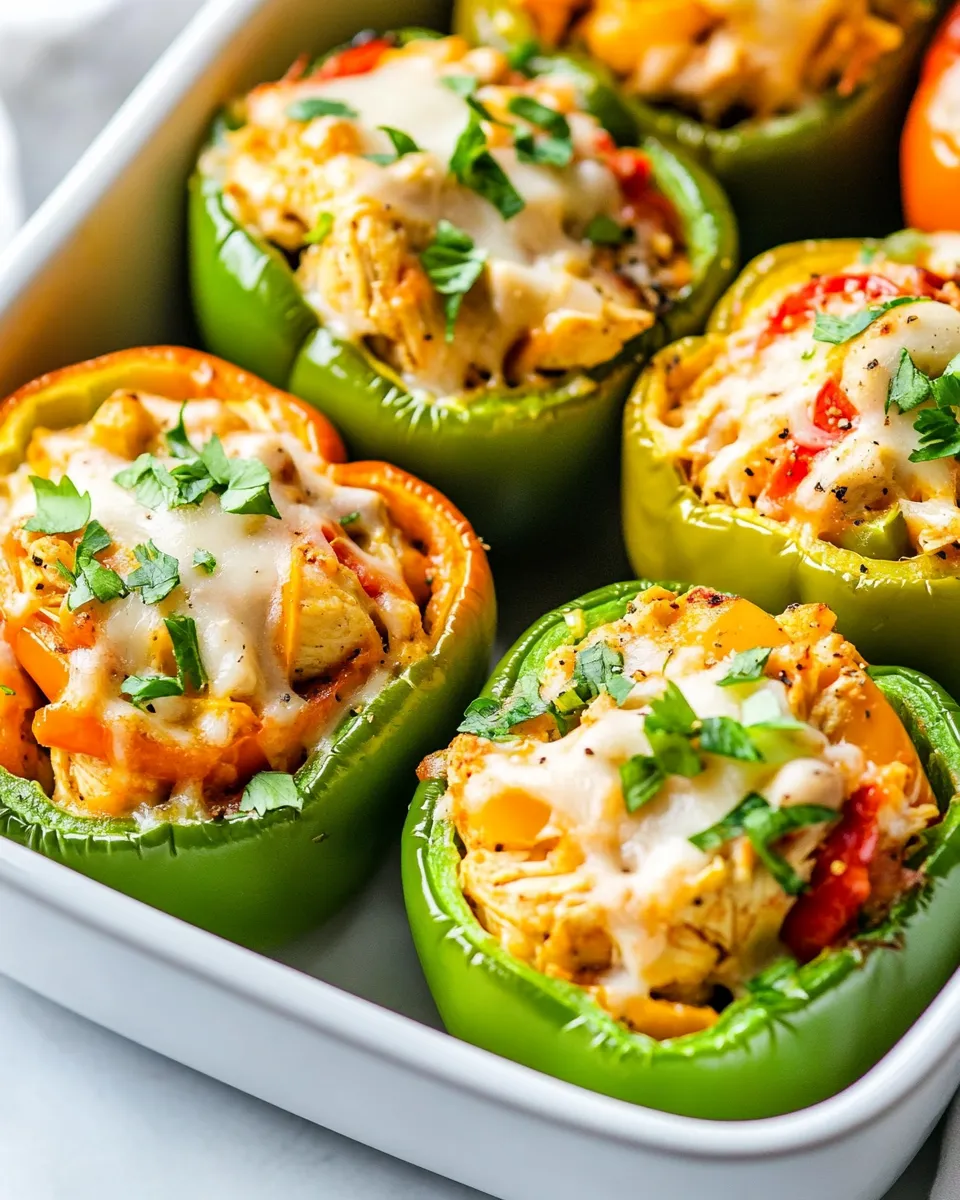
- Bell Peppers: The stars of the dish! Choose a mix of red, orange, yellow, or green for a colorful presentation.
- Shredded Cooked Chicken Breast: Use rotisserie chicken or leftover chicken for convenience and flavor.
- Cumin: A warm spice that adds depth and enhances the overall flavors.
- Adobo Seasoning or Salt: Essential for bringing all the flavors together; adjust to taste.
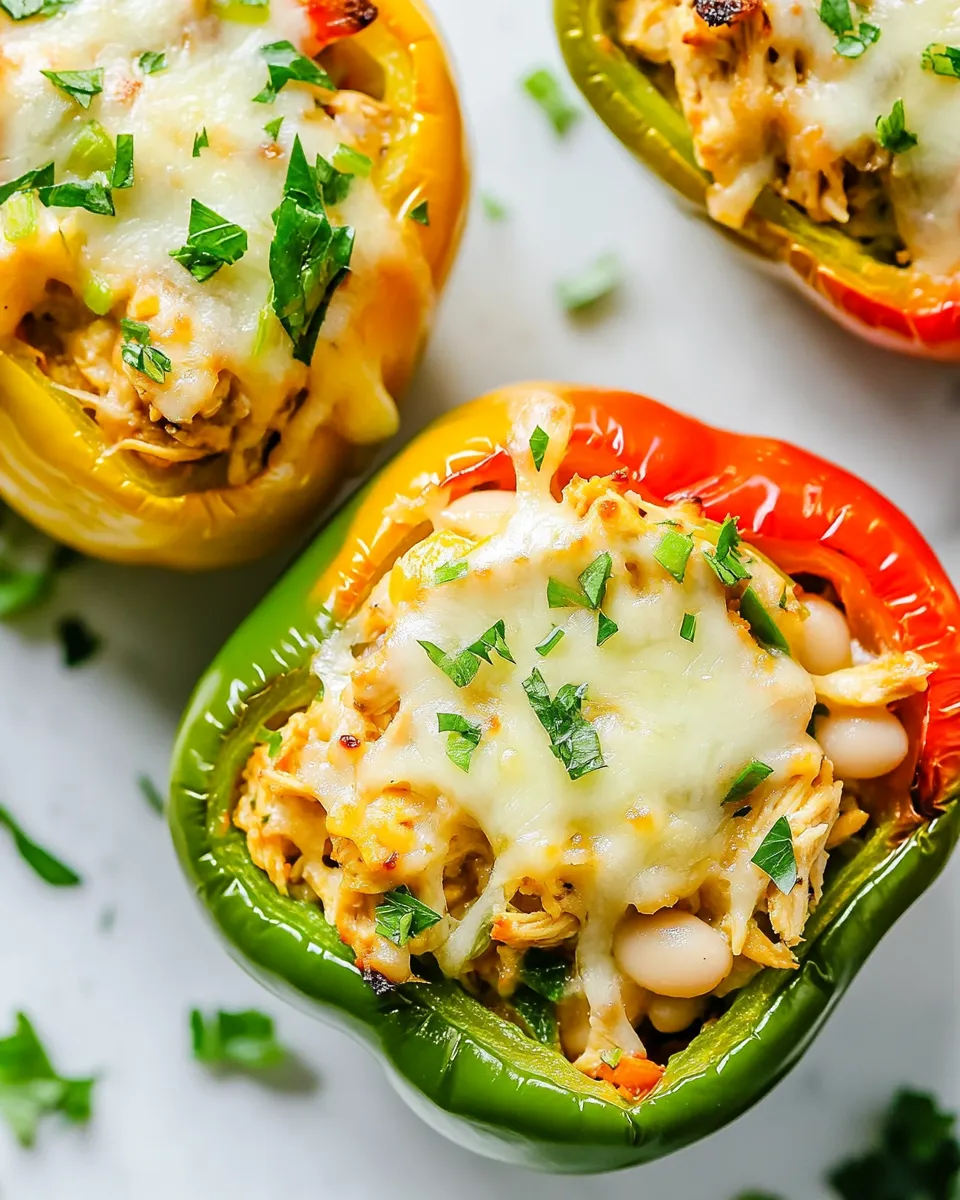
- White Beans: Creamy and nutritious, they contribute to the filling’s texture.
- Reduced Fat Shredded Cheddar: For a cheesy topping that adds richness without too many calories.
Tools & Equipment Needed
- Large Skillet: For sautéing the onions and garlic.
- Baking Dish: To hold your stuffed peppers while they bake.
- Mixing Bowl: For combining the filling ingredients.
- Sharp Knife: For chopping vegetables efficiently.
- Spoon: To scoop out the insides of the bell peppers.
Chicken Stuffed Peppers with White Beans, Made Easy
Step 1: Preheat the Oven
Start by preheating your oven to 375°F (190°C). This will ensure that your stuffed peppers cook evenly and thoroughly.
Step 2: Prepare the Peppers
While the oven is heating, wash the bell peppers and slice the tops off. Remove the seeds and membranes carefully, making sure to leave the bell peppers intact for stuffing. Set them aside.
Step 3: Sauté the Aromatics
In a large skillet, heat 2 teaspoons of olive oil over medium heat. Add the chopped onion and cook for about 3-4 minutes until softened. Then, add the garlic and minced red bell pepper, cooking for an additional 2 minutes until fragrant.
Step 4: Make the Filling
In a large mixing bowl, combine the sautéed onion and garlic mixture with 14 oz of shredded cooked chicken breast, 3/4 teaspoon of cumin, 1/2 teaspoon of adobo seasoning or salt, 15.5 oz can of white beans (not drained), and 1/4 cup of cilantro or parsley. Mix thoroughly until combined.
Step 5: Stuff the Peppers
Spoon the filling generously into each bell pepper, packing it in tightly. Place the stuffed peppers upright in a baking dish.
Step 6: Top with Cheese
Sprinkle 1/2 cup of reduced fat shredded cheddar cheese evenly over the tops of the stuffed peppers.
Step 7: Bake
Cover the baking dish with aluminum foil and bake in the preheated oven for 25 minutes. After 25 minutes, remove the foil and bake for an additional 10-15 minutes or until the cheese is bubbly and golden brown.
Step 8: Serve
Once baked, remove the stuffed peppers from the oven and let them cool for a few minutes. Garnish with additional cilantro or parsley if desired, and serve warm. Enjoy your Chicken Stuffed Peppers with White Beans as a hearty main dish!
Spring–Summer–Fall–Winter Ideas
- Add seasonal vegetables like zucchini or corn during the summer for a fresh twist.
- In the fall, incorporate pumpkin puree into the filling for added creaminess and flavor.
- During winter, serve with a side of warm quinoa or couscous to make it even heartier.
- For spring, swap the white beans for cooked lentils for a lighter filling.
Behind the Recipe
This recipe was inspired by the need for a quick and nutritious meal that the whole family would enjoy. Chicken Stuffed Peppers with White Beans combines convenience with flavor, making it a go-to dish for busy weeknights. Using leftover rotisserie chicken not only saves time but also maximizes flavor. The addition of white beans not only boosts the protein content but also gives a creamy texture that pairs beautifully with the peppers.
Prep Ahead & Store
You can prepare the filling ahead of time and store it in the refrigerator for up to 2 days. Simply stuff the peppers when you’re ready to bake. Leftover stuffed peppers can be stored in an airtight container in the refrigerator for up to 4 days. Reheat in the microwave or oven until warmed through. They also freeze well for up to 3 months; just make sure to wrap them tightly in plastic wrap and foil.
Top Questions & Answers
Can I use a different type of meat for the filling?
Absolutely! Ground turkey, beef, or even a plant-based meat substitute would work well in this recipe. Just be sure to adjust the cooking times accordingly.
What can I serve with Chicken Stuffed Peppers with White Beans?
These stuffed peppers are delicious on their own, but you can pair them with a simple green salad, steamed vegetables, or a side of rice for a complete meal.
Can I make this recipe vegetarian?
Yes! Simply omit the chicken and replace it with more beans or grains like quinoa. You can also add more vegetables to the filling for extra flavor and texture.
How do I know when the peppers are done cooking?
The peppers should be tender but still hold their shape. The cheese on top should be melted and slightly browned. If you’re unsure, you can test the peppers with a fork; they should pierce easily.
Bring It Home
Now that you have all the details to make your own Chicken Stuffed Peppers with White Beans, it’s time to gather your ingredients and get cooking! This dish is not just about filling your belly; it’s about bringing joy to the table and sharing delicious moments with loved ones. With vibrant colors and mouthwatering flavors, these stuffed peppers are sure to become a favorite in your home. Whether it’s a busy weeknight or a weekend gathering, these stuffed peppers will impress everyone at your table. Happy cooking!
Chicken Stuffed Peppers with White Beans
Ingredients
Equipment
Method
- Step 1: Preheat the Oven. Start by preheating your oven to 375°F (190°C).
- Step 2: Prepare the Peppers. Wash the bell peppers and slice the tops off, removing the seeds and membranes.
- Step 3: Sauté the Aromatics. In a large skillet, heat the olive oil over medium heat. Add the chopped onion and cook for 3-4 minutes until softened. Then, add the garlic and minced red bell pepper, cooking for an additional 2 minutes until fragrant.
- Step 4: Make the Filling. In a large mixing bowl, combine the sautéed onion and garlic mixture with shredded chicken, cumin, adobo seasoning, white beans, and cilantro or parsley. Mix thoroughly.
- Step 5: Stuff the Peppers. Spoon the filling into each bell pepper, packing it tightly. Place the stuffed peppers upright in a baking dish.
- Step 6: Top with Cheese. Sprinkle the shredded cheddar cheese evenly over the tops of the stuffed peppers.
- Step 7: Bake. Cover the dish with aluminum foil and bake for 25 minutes. Remove the foil and bake for an additional 10-15 minutes until the cheese is bubbly and golden brown.
- Step 8: Serve. Let the stuffed peppers cool for a few minutes, garnish with cilantro or parsley, and serve warm.
Notes
- Prepare the filling ahead of time and refrigerate for up to 2 days.
- Leftover stuffed peppers can be stored in an airtight container for up to 4 days.
- These stuffed peppers freeze well for up to 3 months; wrap them tightly before freezing.