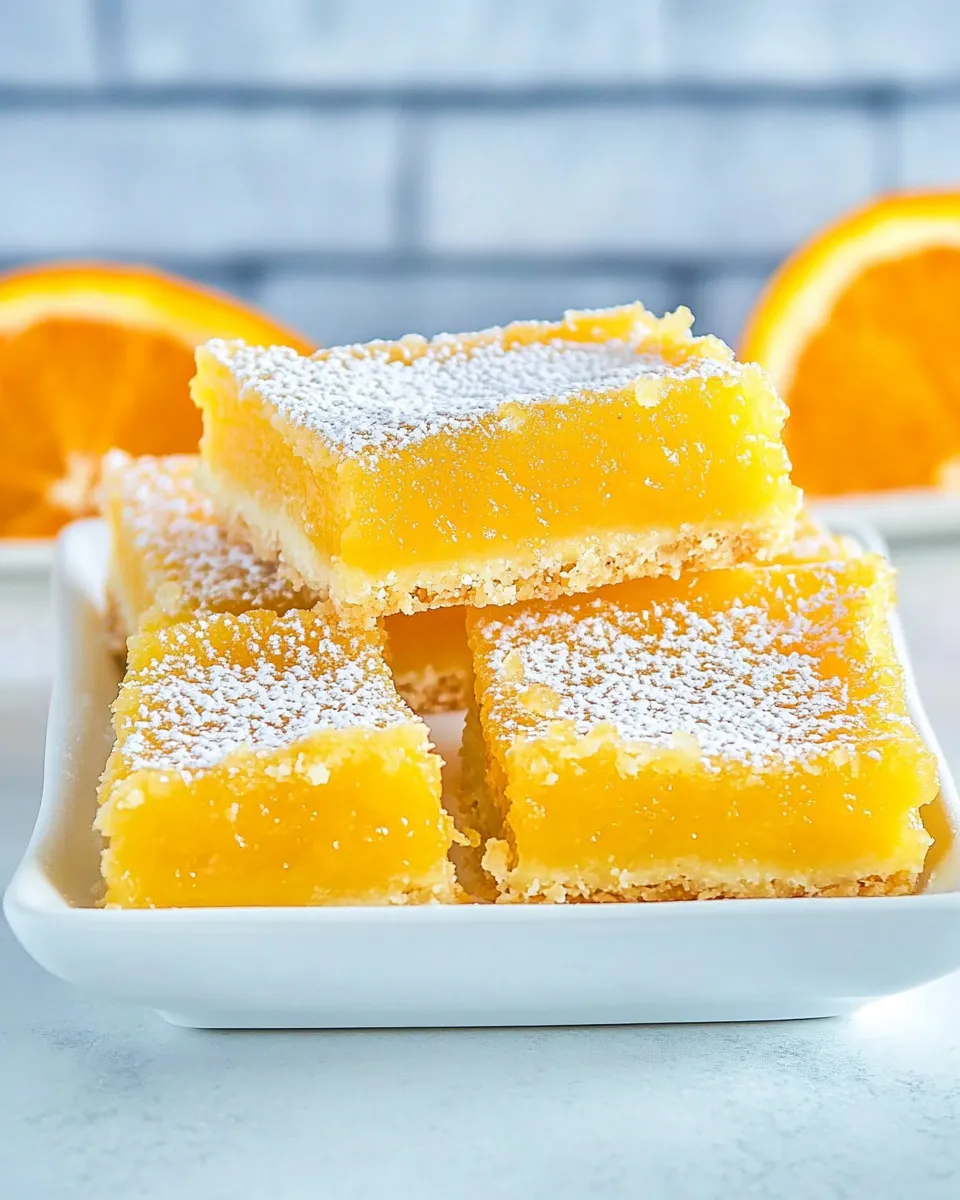
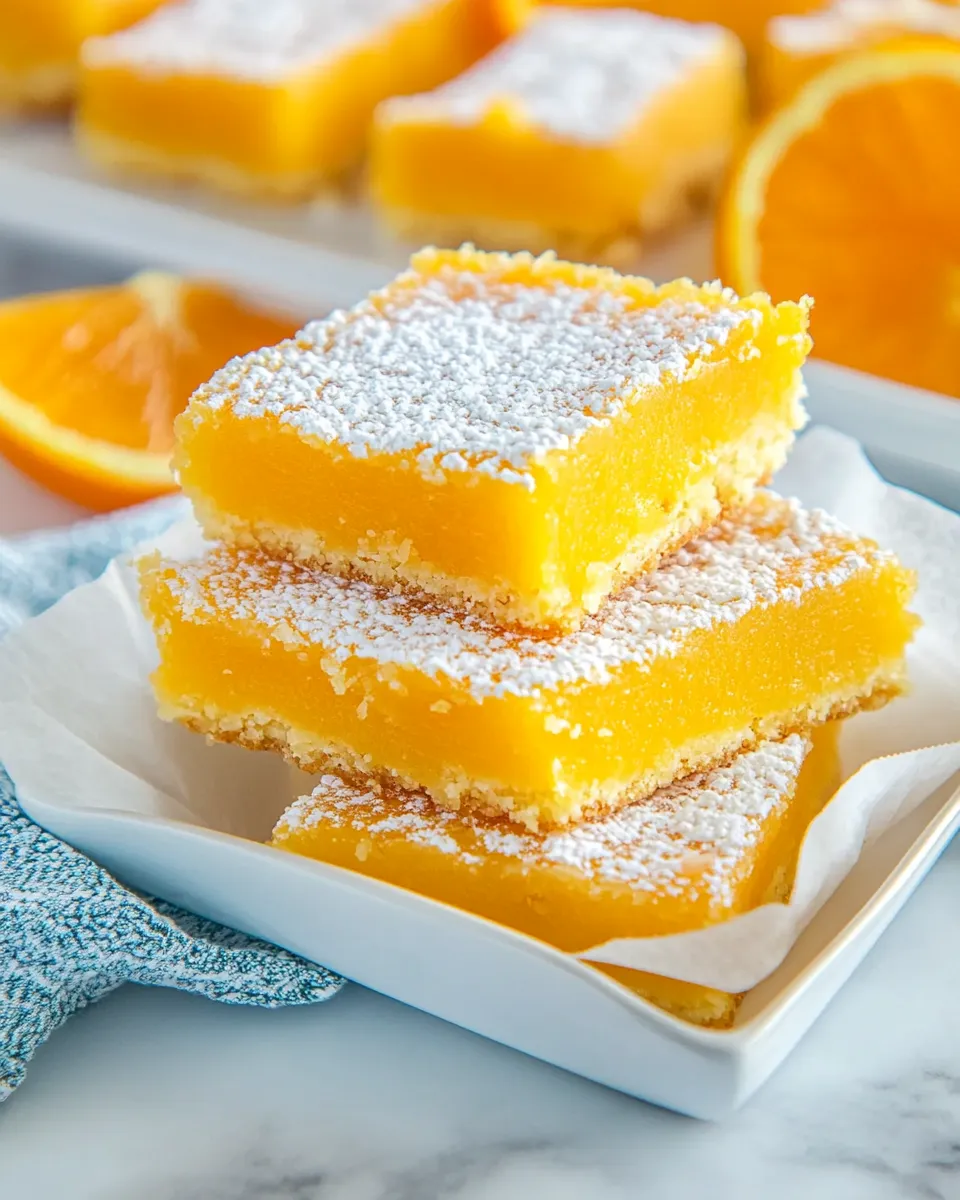
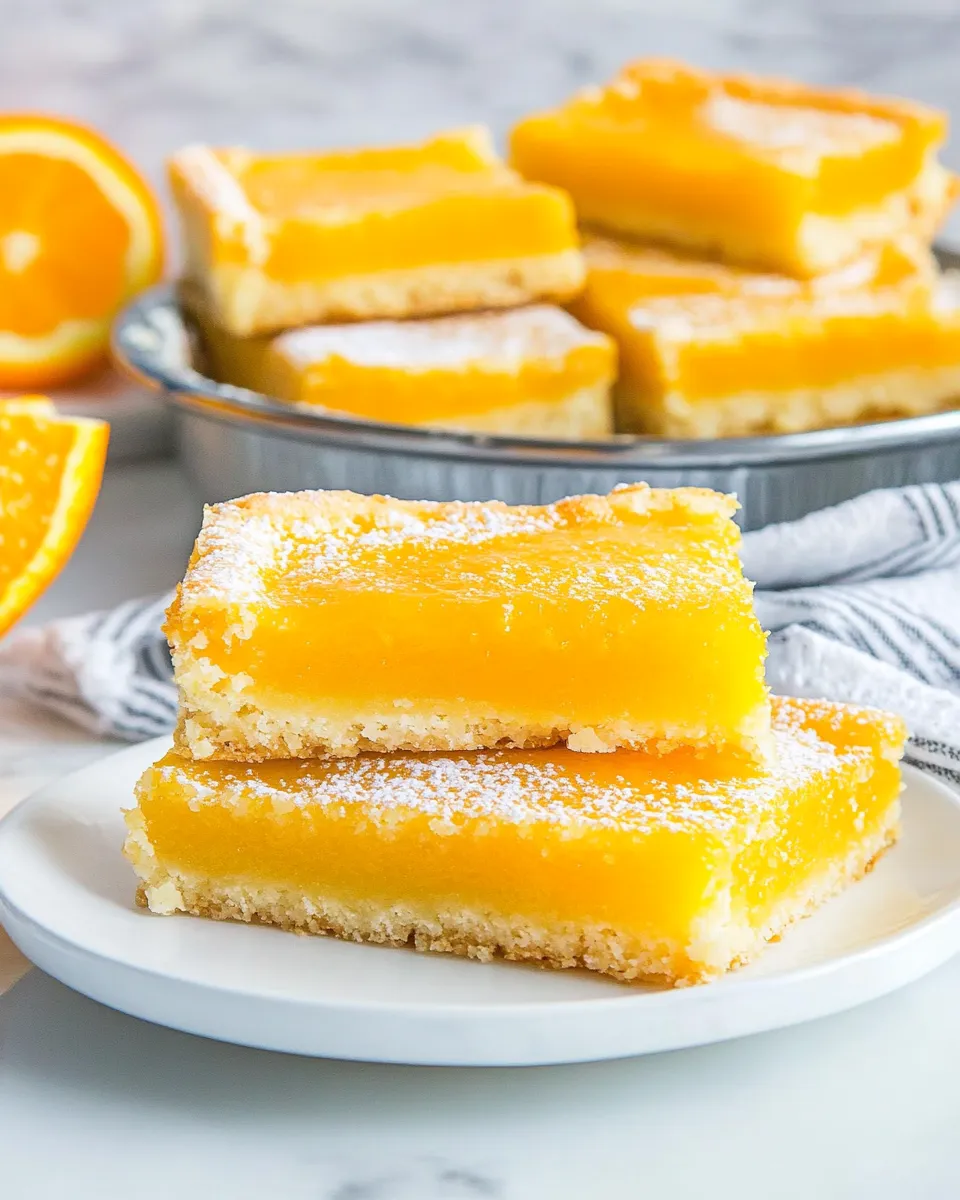
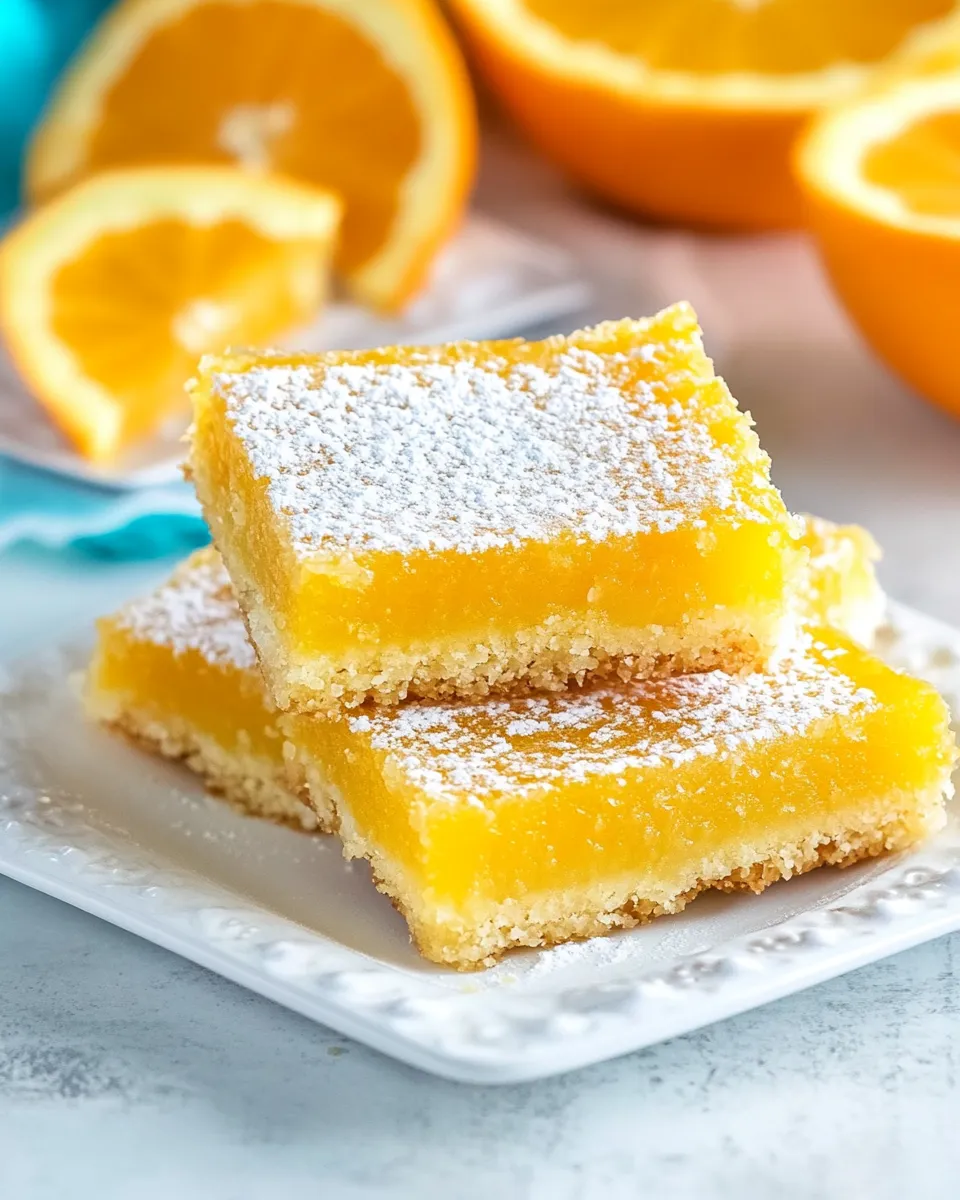
There’s something undeniably refreshing about citrus desserts, and these Orange Bars are no exception. With a delightful blend of zesty flavors, these bars are perfect for brightening up any occasion, whether it be a sunny afternoon picnic or a cozy gathering with friends. The combination of fresh orange juice and zest gives these bars their signature flavor, while a buttery crust adds a rich texture that perfectly complements the bright filling. Get ready to indulge in a treat that will have everyone asking for the recipe!
Why You’ll Love This Recipe
These Orange Bars are not just delicious; they’re also incredibly easy to make. The contrast between the sweet, tangy filling and the buttery crust creates a harmonious balance of flavors. Plus, they are versatile enough for any season! Whether you’re celebrating a holiday or simply enjoying a casual day at home, these bars will impress. The best part? They’re a crowd-pleaser, making them perfect for parties or potlucks. Once you take a bite, you’ll understand why these Orange Bars are destined to become a favorite in your dessert repertoire.
Ingredient Notes
- Unsalted Butter (1 cup, 226g): Using unsalted butter allows you to control the saltiness of your dessert. Make sure it’s at room temperature for easier mixing.
- All-Purpose Flour (2 cups, 248g + 1/4 cup, 31g): This is the base for both the crust and the filling. Ensure you measure accurately for the best results.
- Granulated Sugar (1 cup, 100g + 1 1/4 cups, 150g): Sugar sweetens the bars and helps create that lovely texture. Use fine granulated sugar for a smooth consistency.
- Salt (1/4 teaspoon): A small amount enhances the flavors of the other ingredients.
- Fresh Squeezed Orange Juice (1/2 cup, 119ml): Fresh juice gives the bars a vibrant flavor. Avoid bottled juice for the best taste.
- Zest of 1 Orange: Zest adds an intense orange flavor that complements the juice beautifully.
- Orange Extract (1 teaspoon): This enhances the orange flavor; however, it can be omitted if you prefer a more subtle taste.
- Baking Powder (1/2 teaspoon): This is essential for making the filling rise and become fluffy.
- Eggs (4 large): Eggs provide structure and moisture to the filling, helping it set perfectly.
- Powdered Sugar for Topping: A light dusting of powdered sugar adds a touch of sweetness and a pretty finish.
Appliances & Accessories
- Mixing Bowl: A large bowl for mixing the crust and filling.
- Electric Mixer: Useful for beating the eggs and sugar together quickly.
- Measuring Cups and Spoons: For precise measurements of all ingredients, ensuring the best results.
- 9×13-inch Baking Pan: This size is perfect for making a large batch of Orange Bars.
- Juicer: If you have one, it makes extracting juice from fresh oranges a breeze.
Method: Orange Bars
Step 1: Prepare the Oven and Baking Pan
Preheat your oven to 350°F (175°C). Grease and line your 9×13-inch baking pan with parchment paper, leaving some overhang for easy removal later.
Step 2: Make the Crust
In a mixing bowl, beat together the 1 cup of unsalted butter and 1 cup of granulated sugar until creamy and light. This should take about 2-3 minutes. Add the 2 cups of all-purpose flour and 1/4 teaspoon of salt, mixing until just combined.
Step 3: Bake the Crust
Press the crust mixture evenly into the bottom of the prepared pan. Bake for 18-20 minutes, or until lightly golden. Remove from the oven and let it cool slightly while you prepare the filling.
Step 4: Prepare the Filling
In a clean mixing bowl, whisk together the 4 large eggs and 1 1/4 cups of granulated sugar until well combined. Stir in the 1/2 cup of fresh squeezed orange juice, zest of 1 orange, 1 teaspoon of orange extract, and 1/4 cup of all-purpose flour mixed with 1/2 teaspoon of baking powder. Mix until smooth.
Step 5: Bake the Filling
Pour the filling over the pre-baked crust, spreading it evenly. Return the pan to the oven and bake for an additional 20-25 minutes, or until the filling is set and lightly golden on top.
Step 6: Cool and Serve
Once baked, remove the Orange Bars from the oven and let them cool in the pan. Once cooled, lift them out using the parchment overhang and cut into squares. Dust with powdered sugar before serving for an elegant touch.
Season-by-Season Upgrades
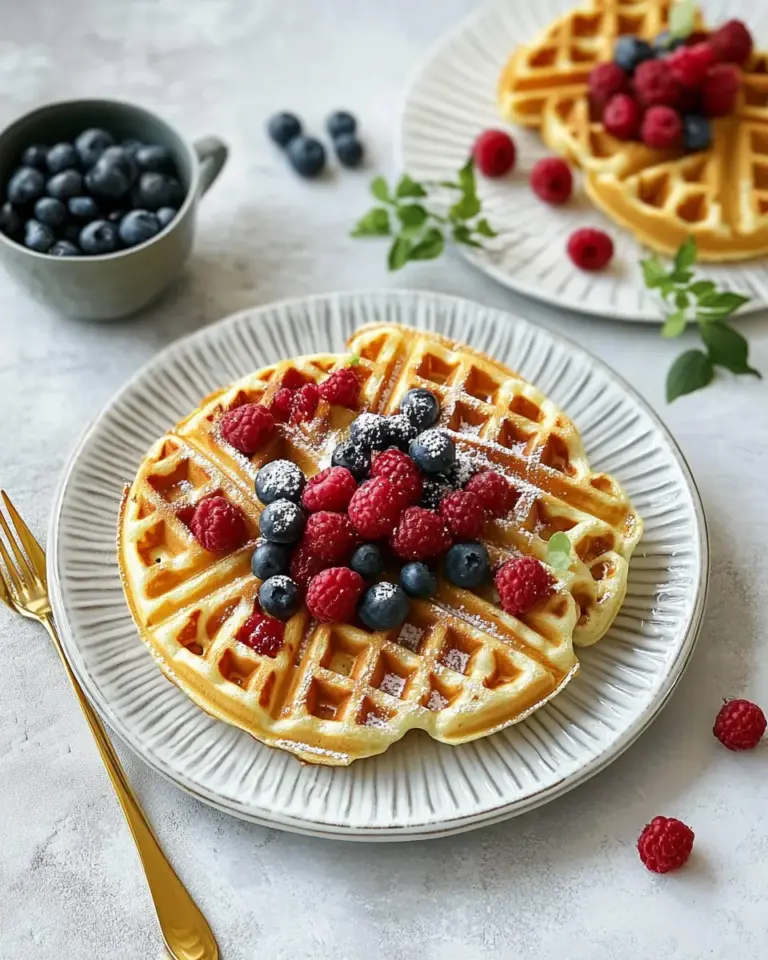
- Spring/Summer: Incorporate fresh berries like raspberries or blueberries on top for a fruity twist.
- Fall: Add a pinch of cinnamon to the filling for a warm, cozy flavor.
- Winter: Serve with a dollop of whipped cream or a scoop of vanilla ice cream for a decadent dessert.
- Any Season: Pair with a refreshing cup of tea or coffee to elevate your dessert experience.
Frequent Missteps to Avoid
- Not letting the butter come to room temperature can lead to a lumpy crust.
- Overmixing the filling can make it tough; mix just until combined.
- Using bottled orange juice instead of fresh can result in a less vibrant flavor.
- Not cooling the bars completely before cutting can lead to messy squares.
Leftovers & Meal Prep
These Orange Bars can be stored in an airtight container at room temperature for up to 3 days. If you want to keep them longer, they can be refrigerated for up to a week. For meal prep, these bars are perfect for making ahead of time. Just bake, cool, and store them until you’re ready to serve. You can also freeze them for up to 3 months. Just make sure to wrap them tightly in plastic wrap and then foil to prevent freezer burn.
Helpful Q&A
Can I use a different type of citrus juice?
Absolutely! Lemon, lime, or grapefruit juice can be substituted for orange juice for a different flavor profile. Just keep in mind that you may need to adjust the sugar level depending on the tartness of the fruit.
Can I make these Orange Bars gluten-free?
Yes! You can substitute all-purpose flour with a gluten-free flour blend. Just ensure it’s a 1:1 substitute for best results.
What can I do if I don’t have orange extract?
If you don’t have orange extract on hand, you can simply omit it. The bars will still taste delicious with the fresh orange juice and zest.
How do I make these Orange Bars more visually appealing?
For an extra touch, you can drizzle a simple glaze made from powdered sugar and a bit of orange juice over the bars before serving. Adding thinly sliced orange segments on top as a garnish can also elevate their presentation.
Final Thoughts
Creating these Orange Bars is a delightful way to celebrate the vibrant flavors of citrus. The combination of buttery crust and tangy filling is sure to make them a hit with family and friends. Don’t be surprised if these bars quickly become a staple in your dessert rotation! Whether enjoyed as a sweet snack or a special dessert, Orange Bars are a treat that brings sunshine to any table. So gather your ingredients, roll up your sleeves, and enjoy the process of baking these delicious bars. Happy baking!
Orange Bars
Ingredients
Equipment
Method
- Preheat your oven to 350°F (175°C). Grease and line your 9x13-inch baking pan with parchment paper, leaving some overhang for easy removal later.
- In a mixing bowl, beat together the unsalted butter and granulated sugar until creamy and light, about 2-3 minutes. Add the all-purpose flour and salt, mixing until just combined.
- Press the crust mixture evenly into the bottom of the prepared pan. Bake for 18-20 minutes, or until lightly golden. Remove from the oven and let it cool slightly.
- In a clean mixing bowl, whisk together the eggs and granulated sugar until well combined. Stir in the orange juice, zest, orange extract, and the flour mixed with baking powder. Mix until smooth.
- Pour the filling over the pre-baked crust, spreading it evenly. Return the pan to the oven and bake for an additional 20-25 minutes, or until the filling is set and lightly golden on top.
- Once baked, remove the Orange Bars from the oven and let them cool in the pan. Once cooled, lift them out using the parchment overhang and cut into squares. Dust with powdered sugar before serving.
Notes
- Store leftovers in an airtight container at room temperature for up to 3 days.
- For longer storage, refrigerate for up to a week or freeze for up to 3 months.
- To make gluten-free, substitute all-purpose flour with a gluten-free blend.