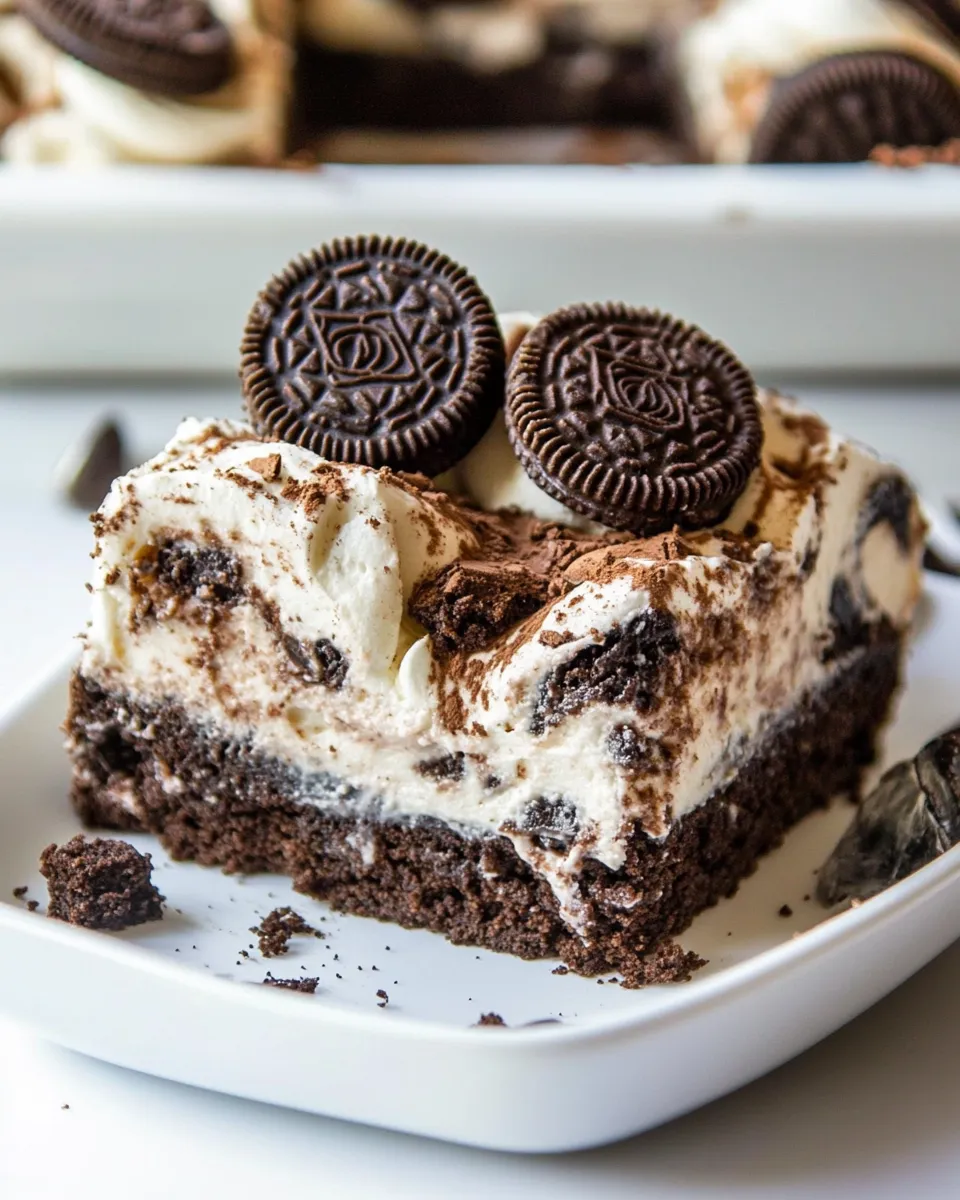
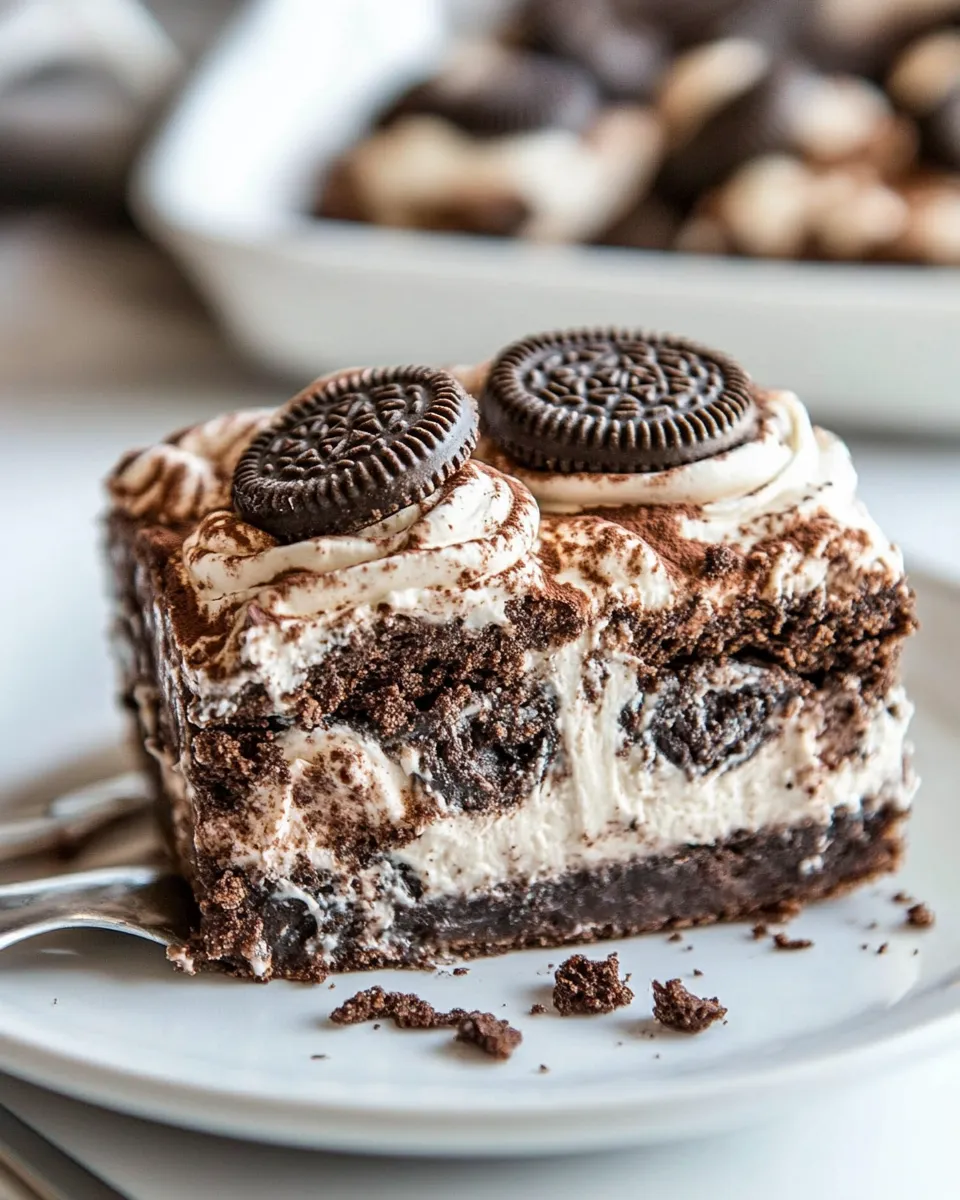
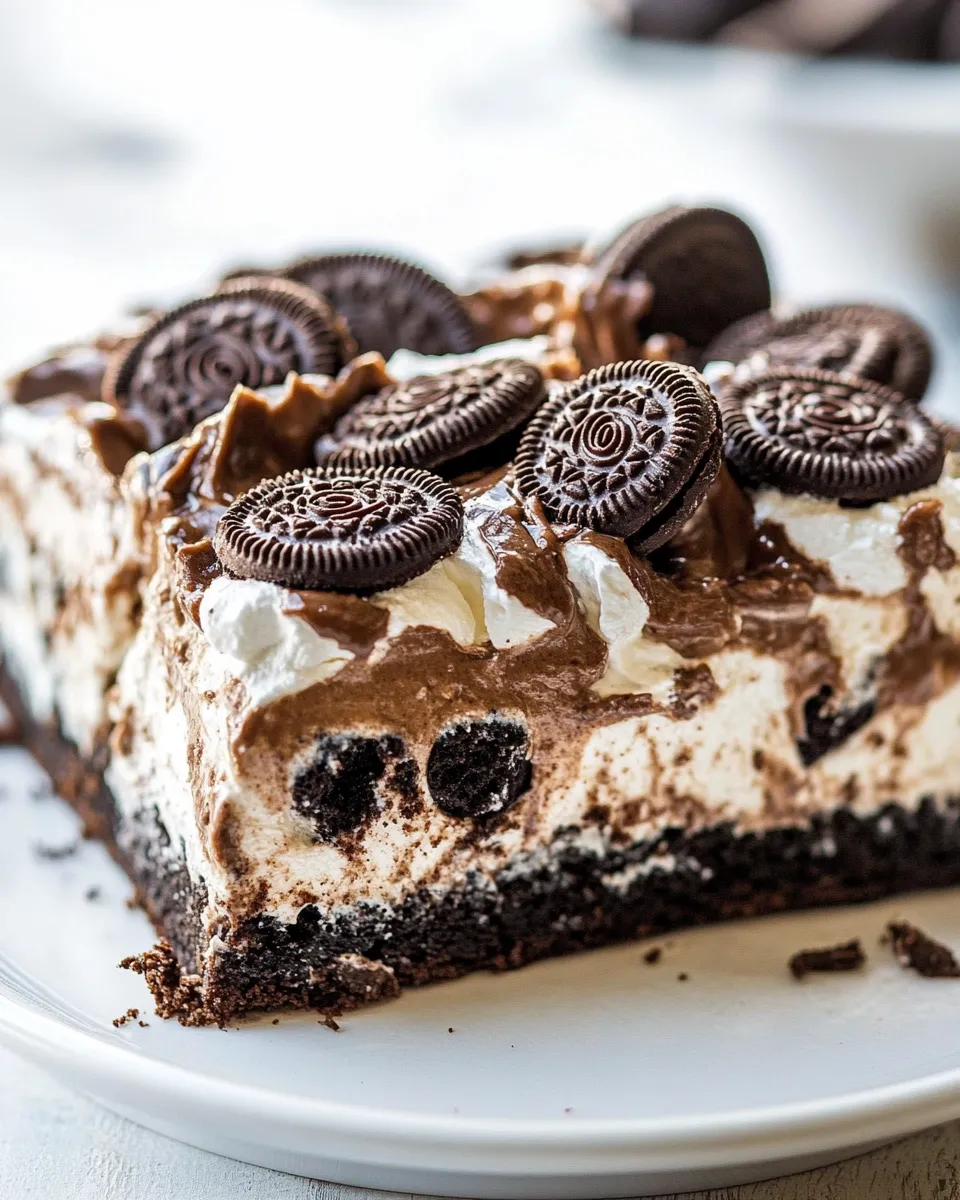
If you’re ready to take your dessert game to the next level, this Oreo Brownie Lush is just what you need. This indulgent treat layers rich, fudgy brownies with a creamy, dreamy filling and a delightful crunch from everyone’s favorite cookie—Oreo. Perfect for parties, family gatherings, or a special night in, this dessert is bound to impress. Let’s get into why this Oreo Brownie Lush stands out and how you can whip it up in your own kitchen!
Why This Oreo Brownie Lush Stands Out

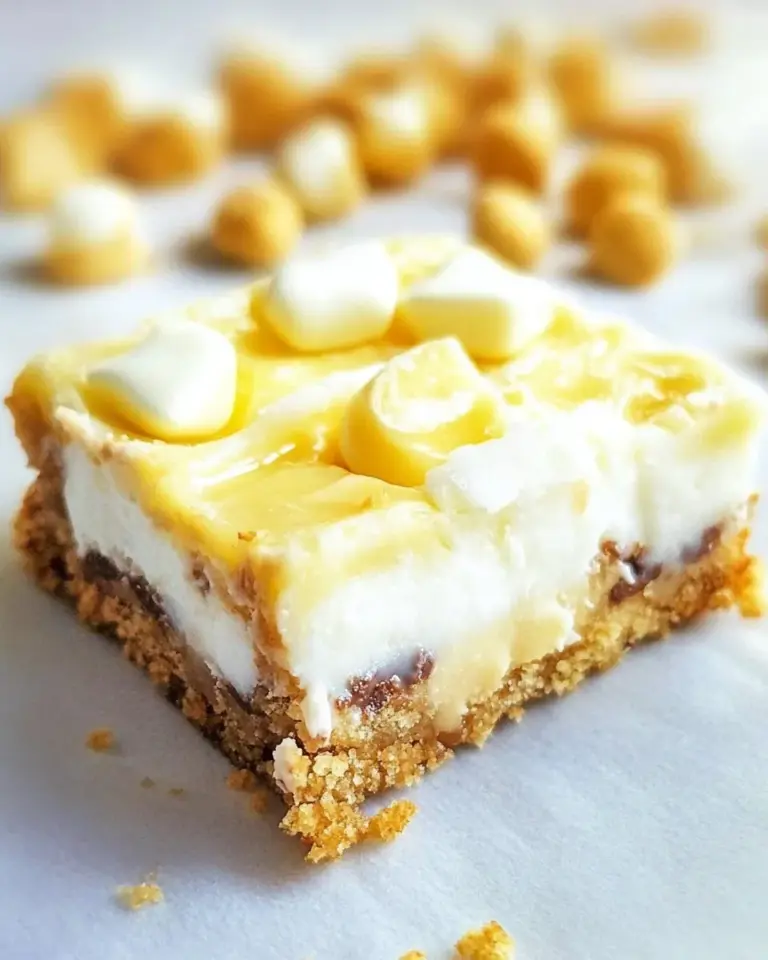
This Oreo Brownie Lush is not just a dessert; it’s a showstopper. Imagine biting into a layer of chewy brownies complemented by a luscious cream cheese and whipped topping mixture, punctuated by the iconic chocolatey crunch of Oreos. Its layers create a delightful combination of flavors and textures that make each bite a little celebration. With simple ingredients and straightforward steps, this dessert is accessible to bakers of all levels.
What You’ll Gather
- One 20-ounce box brownie mix, plus ingredients called for to make the brownies
- One 8-ounce block cream cheese, softened (I used lite)
- One cup confectioners sugar
- One 12-ounce tub whipped topping, thawed (I used fat-free)
- Thirty Oreo cookies, coarsely chopped (divided)
- Two 3.9-ounce boxes instant chocolate pudding mix
- Three cups cold milk (use real milk; I used 2%; non-dairy or nut/soy-based milks will not work and pudding won’t set)
Tools of the Trade
- Mixing bowls – for combining the different layers.
- 9×13 inch baking dish – perfect for layering your luscious dessert.
- Electric mixer – to make whipping the cream cheese and whipped topping a breeze.
- Spatula – for spreading layers evenly.
Directions: Oreo Brownie Lush
Step 1: Prepare the Brownies
Start by preheating your oven according to the instructions on the brownie mix box. Prepare the brownie batter as directed on the packaging, then pour it into a greased 9×13 inch baking dish. Bake until a toothpick inserted in the center comes out with a few moist crumbs. Allow the brownies to cool completely in the pan.
Step 2: Make the Cream Cheese Layer
In a mixing bowl, combine the softened cream cheese and confectioners sugar. Use an electric mixer to beat until smooth and well combined. Gently fold in half of the thawed whipped topping until incorporated. This will be the luscious layer that adds richness to your dessert.
Step 3: Assemble the Layers
Once the brownies are completely cooled, spread the cream cheese mixture evenly over the brownie layer. Next, sprinkle half of the coarsely chopped Oreo cookies on top of the cream cheese layer.
Step 4: Prepare the Pudding Layer
In a separate bowl, whisk together the instant chocolate pudding mix and cold milk. Make sure to use real milk, as non-dairy alternatives will not set properly. Continue whisking until the mixture thickens, which should take about 2 minutes. Carefully spread the pudding over the Oreo cookie layer.
Step 5: Add the Final Touches
Spread the remaining whipped topping over the pudding layer, smoothing it out evenly. Finally, sprinkle the remaining chopped Oreo cookies on top to create a beautiful finish.
Step 6: Chill and Serve
Cover the dish with plastic wrap and refrigerate for at least 4 hours, or overnight if possible. This allows the layers to set and the flavors to meld together beautifully. Once chilled, cut into squares and serve!
Allergy-Friendly Substitutes
- For a gluten-free version, use a gluten-free brownie mix.
- Use dairy-free cream cheese and whipped topping for a dairy-free option.
- Substitute the chocolate pudding mix with a dairy-free variety if needed.
Little Things that Matter
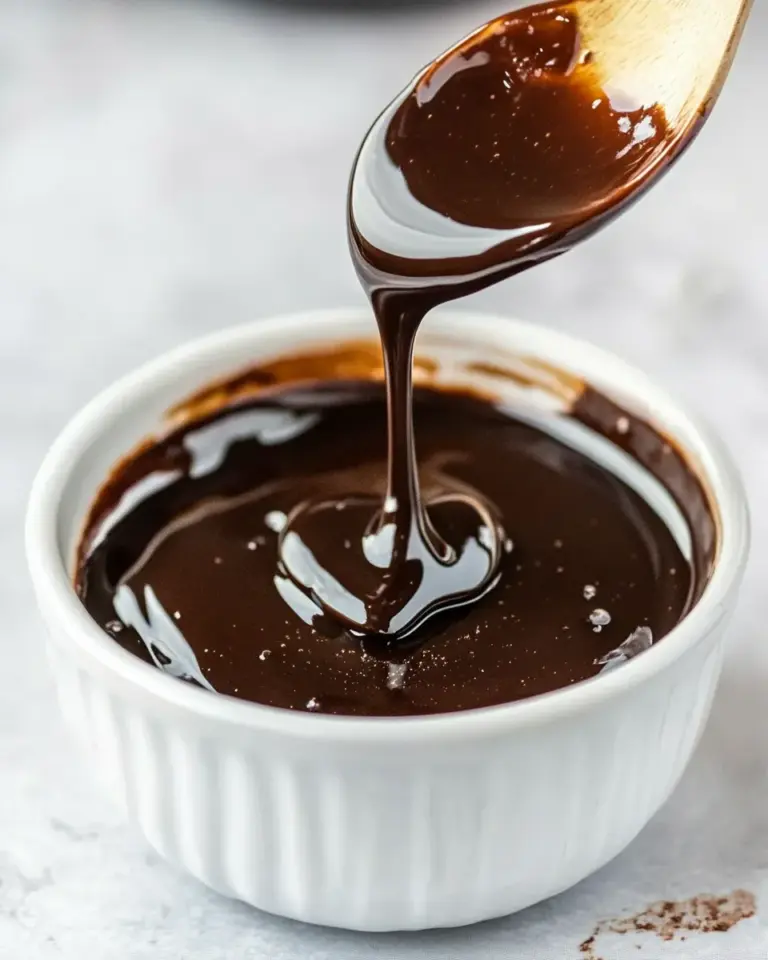
When making this Oreo Brownie Lush, it’s essential to allow your brownies to cool completely before adding the cream cheese layer. This prevents the layers from melting into one another and keeps your dessert looking beautiful. Additionally, feel free to get creative with the toppings. A drizzle of chocolate sauce or some sprinkles can add a fun touch!
Save It for Later
This dessert can be made a day in advance, making it a perfect option for gatherings. If you have leftovers (which is rare!), you can store them covered in the refrigerator for up to 3 days. Just be sure to keep it well sealed to maintain freshness.
Quick Questions
Can I use a different type of cookie?
Absolutely! While Oreos are iconic for this dessert, feel free to experiment with other cookies like chocolate sandwich cookies or even peanut butter cookies for a fun twist.
How can I make this dessert dairy-free?
Use dairy-free cream cheese, whipped topping, and pudding mix. Ensure you also use a suitable non-dairy milk that sets well.
Can I freeze Oreo Brownie Lush?
Yes, you can freeze it! However, it’s best to freeze it before adding the whipped topping. After assembling, cover it tightly and freeze for up to a month. Allow it to thaw in the fridge before serving.
What can I serve with Oreo Brownie Lush?
This indulgent dessert pairs wonderfully with a scoop of vanilla ice cream or a dollop of whipped cream on top. For a festive touch, try serving it alongside Christmas Present Oreo Truffles.
Before You Go
If you’re looking for a dessert that combines rich chocolatey flavors with a creamy, dreamy finish, look no further than this Oreo Brownie Lush. It’s easy to make, absolutely delicious, and perfect for any occasion. Whether you’re hosting a party or simply craving something sweet, this dessert will not disappoint. With its delightful layers and the beloved taste of Oreos, it’s sure to be a hit with family and friends alike. So, roll up your sleeves and get ready to indulge in this decadent treat!
Oreo Brownie Lush
Ingredients
Equipment
Method
- Step 1: Prepare the Brownies - Preheat your oven according to the instructions on the brownie mix box. Prepare the brownie batter as directed and pour it into a greased 9x13 inch baking dish. Bake until a toothpick comes out with a few moist crumbs. Allow brownies to cool completely in the pan.
- Step 2: Make the Cream Cheese Layer - In a mixing bowl, combine the softened cream cheese and confectioners sugar. Use an electric mixer to beat until smooth. Gently fold in half of the thawed whipped topping until incorporated.
- Step 3: Assemble the Layers - Once the brownies are cooled, spread the cream cheese mixture evenly over the brownie layer. Sprinkle half of the chopped Oreo cookies on top.
- Step 4: Prepare the Pudding Layer - In a bowl, whisk together the instant chocolate pudding mix and cold milk until thickened, about 2 minutes. Spread the pudding over the Oreo cookie layer.
- Step 5: Add the Final Touches - Spread the remaining whipped topping over the pudding layer. Sprinkle the remaining chopped Oreo cookies on top.
- Step 6: Chill and Serve - Cover with plastic wrap and refrigerate for at least 4 hours, or overnight. Cut into squares and serve!
Notes
- Allow brownies to cool completely before adding layers to maintain structure.
- Get creative with toppings like chocolate sauce or sprinkles!
- This dessert can be made a day in advance for convenience.