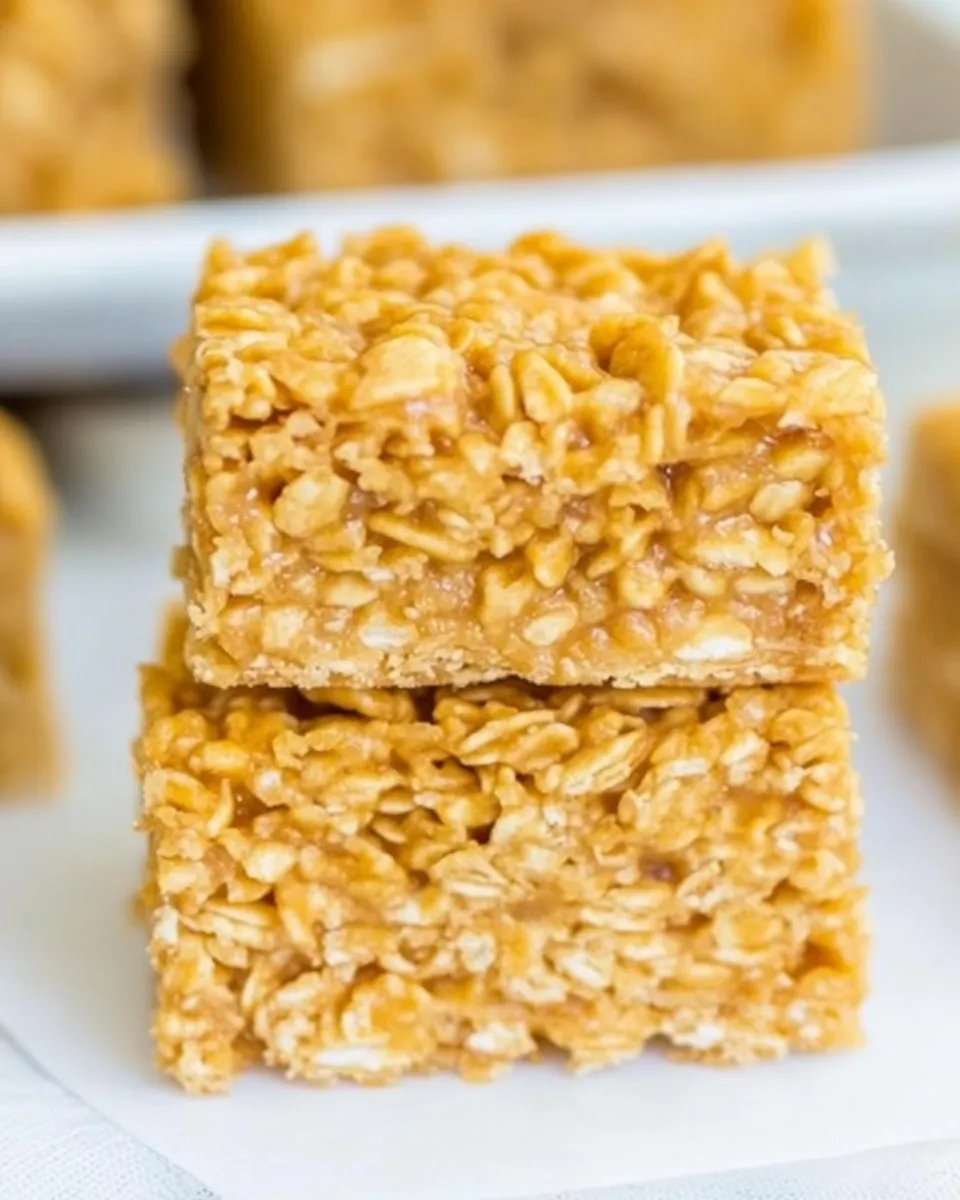
If you’re looking for a quick and satisfying treat that combines sweet, salty, and crunchy elements, then look no further than these delightful Peanut Butter Cornflake Bars. With just three simple ingredients, they come together in a snap and provide a perfect snack for any time of the day. Whether you’re packing lunches, need a quick breakfast on the go, or just want something sweet to nibble on, these bars are sure to please.
Imagine biting into a chewy bar that’s packed with the rich flavor of peanut butter and the satisfying crunch of cornflakes, all sweetened naturally with maple syrup. These bars are not only delicious but incredibly easy to make, meaning you can whip up a batch in no time. Let’s dive into what makes this recipe a must-try!
What Sets This Recipe Apart
What truly sets these Peanut Butter Cornflake Bars apart is their simplicity and versatility. Unlike many dessert recipes that require a long list of ingredients and extensive prep time, this one is straightforward and quick. The combination of cornflakes and nut butter creates a fantastic texture, while the maple syrup brings just the right amount of sweetness without being overwhelming. They are also incredibly adaptable; you can customize them with your favorite nuts, seeds, or even chocolate chips to match your taste preferences.
Shopping List
- 4 cups Corn Flakes – Choose your favorite brand, ensuring they are fresh for maximum crunch.
- 1 cup Peanut Butter – Any nut or seed butter will work, so feel free to use almond butter, sunflower seed butter, or whatever you have on hand.
- 1 cup Maple Syrup – This adds natural sweetness; if you want to substitute, honey is a great alternative.
Before You Start: Equipment
- Large Mixing Bowl – For combining your ingredients.
- Spatula – A sturdy spatula for mixing everything together.
- 9×13-inch Baking Pan – The perfect size for setting your bars.
- Parchment Paper – To line the baking pan, making for easy removal later.
Peanut Butter Cornflake Bars — Do This Next

Step 1: Prepare Your Baking Pan
Start by lining your 9×13-inch baking pan with parchment paper, allowing some excess to hang over the sides. This will help you lift the bars out easily once they are set.
Step 2: Mix the Ingredients
In a large mixing bowl, combine the peanut butter and maple syrup. You can microwave the peanut butter for about 15-20 seconds if it’s too thick, making it easier to mix. Stir until the mixture is smooth and well combined.
Step 3: Add the Corn Flakes
Gently fold the cornflakes into the peanut butter and maple syrup mixture. Be careful not to crush the cornflakes too much; you want to maintain that delightful crunch.
Step 4: Transfer to the Pan
Pour the mixture into your prepared baking pan, spreading it evenly with a spatula. Press down firmly to ensure the bars hold their shape once set.
Step 5: Chill and Set
Refrigerate the bars for at least 1 hour, or until they are firm enough to cut. If you’re in a hurry, you can place them in the freezer for about 30 minutes.
Step 6: Cut and Serve
Once set, use the edges of the parchment paper to lift the bars out of the pan. Cut them into squares or rectangles, and enjoy your homemade Peanut Butter Cornflake Bars!
Seasonal Serving Ideas

- Add mini chocolate chips for a chocolatey twist.
- Top with sliced bananas or berries for a fresh touch during summer.
- Drizzle with melted dark chocolate for a festive treat during the holidays.
- Serve with a dollop of yogurt for a nutritious breakfast option.
Common Errors (and Fixes)
- Bars are Crumbly: If your bars fall apart, try pressing them down more firmly before refrigerating. Ensure your peanut butter is well mixed with the syrup.
- Too Sweet: Reduce the amount of maple syrup in your next batch if you find them overly sweet. You can also mix in unsweetened cocoa powder for a balance.
- Cornflakes are Soggy: Ensure you’re using fresh cornflakes. Stale flakes can absorb moisture and lose their crunch.
How to Store & Reheat
Store your Peanut Butter Cornflake Bars in an airtight container at room temperature for up to a week. For longer storage, keep them in the refrigerator, where they can last up to 10 days. If you prefer them chilled, they can also be stored in the freezer for up to 3 months. When ready to eat, simply thaw at room temperature for a few minutes before enjoying.
Common Questions
Can I use a different type of nut or seed butter?
Absolutely! Any nut or seed butter will work perfectly in this recipe. Almond butter, cashew butter, or sunflower seed butter are all great alternatives that will still yield delicious results.
What can I add to these bars for extra flavor?
You can add a variety of mix-ins such as dried fruit, chocolate chips, or even seeds like chia or flaxseed. Get creative and make them your own!
Are these bars gluten-free?
Yes, as long as you use certified gluten-free cornflakes, these bars are a gluten-free treat that everyone can enjoy.
How do I make this recipe vegan?
This recipe is already suitable for a vegan diet as long as you use maple syrup. Just ensure that your nut or seed butter is also vegan-friendly.
Next Steps
Now that you have the recipe for these delectable Peanut Butter Cornflake Bars, it’s time to gather your ingredients and get started! Don’t forget to customize them to your taste with your favorite mix-ins. These bars are perfect for sharing, but you might just want to keep them all to yourself. Enjoy the crunchy, sweet, and salty goodness that these bars bring to your snack game! Whether for a casual afternoon treat or a fun addition to a party spread, these bars will certainly be a hit. Happy snacking!
Peanut Butter Cornflake Bars
Ingredients
Equipment
Method
- Step 1: Prepare Your Baking Pan - Line your 9x13-inch baking pan with parchment paper, allowing some excess to hang over the sides.
- Step 2: Mix the Ingredients - In a large mixing bowl, combine the peanut butter and maple syrup. Microwave the peanut butter for about 15-20 seconds if it's too thick, then stir until smooth.
- Step 3: Add the Corn Flakes - Gently fold in the cornflakes, being careful not to crush them too much.
- Step 4: Transfer to the Pan - Pour the mixture into your prepared baking pan and spread it evenly, pressing down firmly.
- Step 5: Chill and Set - Refrigerate for at least 1 hour or freeze for about 30 minutes until firm.
- Step 6: Cut and Serve - Lift the bars out using the parchment paper and cut into squares or rectangles.
Notes
- For a chocolatey twist, add mini chocolate chips.
- Top with sliced bananas or berries for a fresh summer touch.
- Store in an airtight container at room temperature for up to a week.