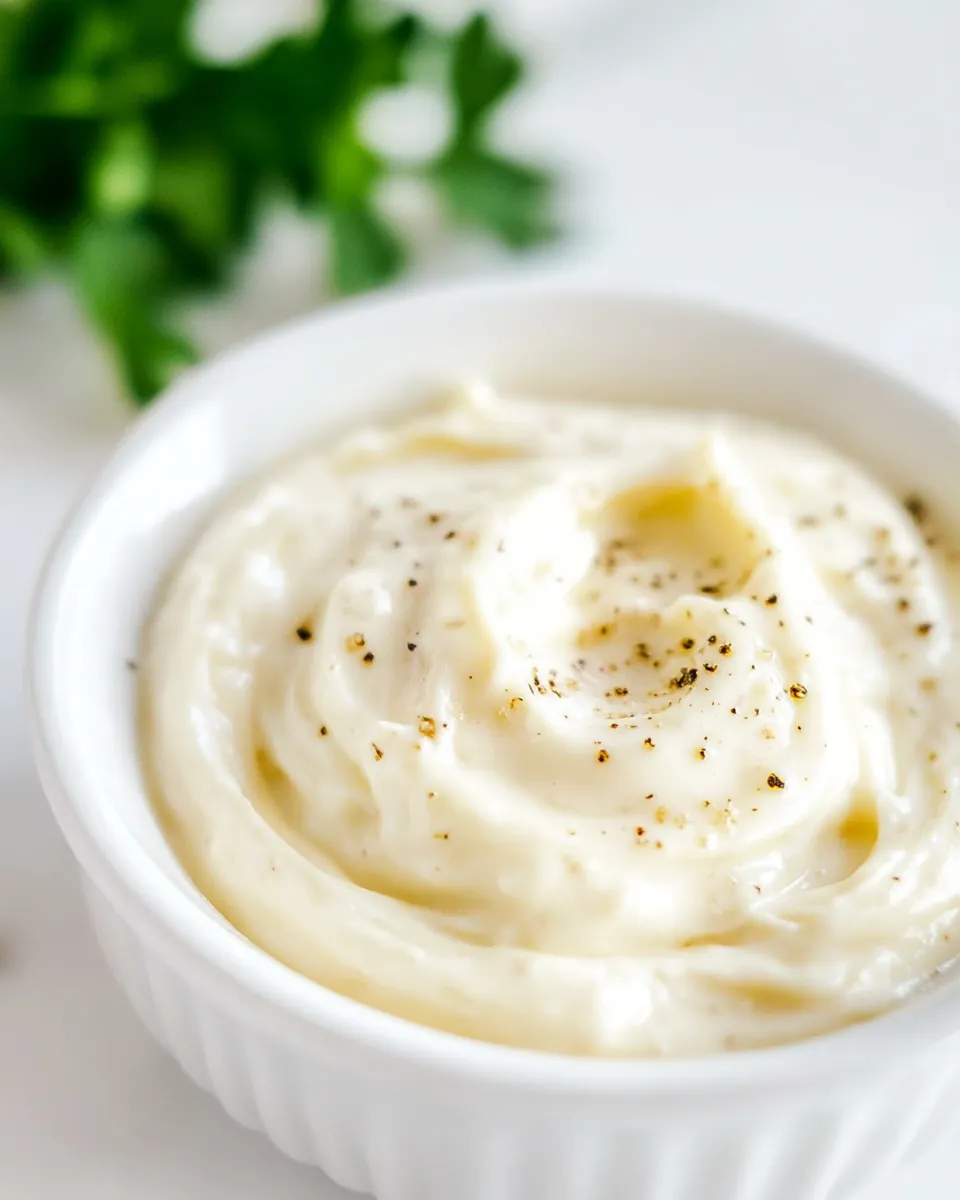
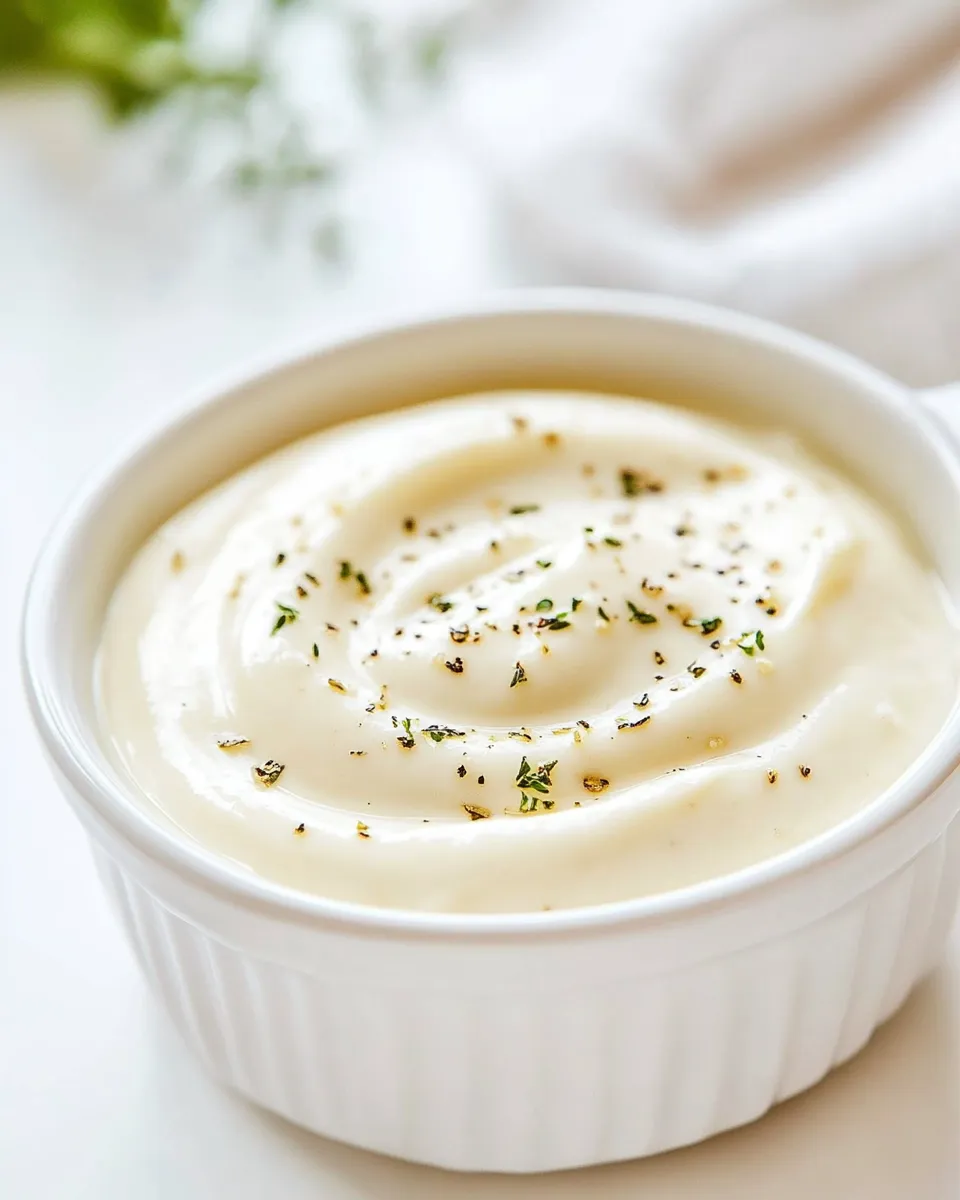
There’s something undeniably delightful about a homemade sauce, and Small-batch Garlic Aioli is no exception. This creamy, garlicky delight is perfect for dipping, slathering, or drizzling on your favorite dishes. Whether you’re serving it with crispy vegetables, fish, or just enjoying it with your favorite bread, this aioli is sure to elevate any meal. Best of all, it’s incredibly easy to make and requires just a handful of ingredients, making it a go-to recipe for those quick culinary moments. Let’s dive into the details!
Why You’ll Love This Recipe

This Small-batch Garlic Aioli is not only simple to prepare, but it also captures the essence of fresh garlic and zesty lemon in a luxurious creamy base. Unlike store-bought versions, this aioli allows you to control the ingredients, ensuring a fresh taste without any preservatives. The small-batch aspect means you can whip it up on demand, making it perfect for a quick snack or an impressive appetizer for your guests. Plus, it pairs beautifully with a variety of dishes, from grilled meats to roasted vegetables.
Ingredient Breakdown
To whip up this delicious Small-batch Garlic Aioli, you’ll need the following ingredients:
- 1/4 cup (56g) mayonnaise: This serves as the creamy base of your aioli. Opt for a high-quality mayonnaise for the best flavor.
- 1 garlic clove, pressed: Fresh garlic is key! Use a garlic press to release all the essential oils and flavors.
- 1 teaspoon lemon juice: Freshly squeezed lemon juice adds brightness and acidity, balancing the richness of the mayonnaise.
- 1/8 teaspoon salt: Enhances the overall flavor of your aioli.
- 1/8 teaspoon pepper: Adds a subtle kick to the sauce.
Must-Have Equipment
Before you get started, make sure you have the following equipment on hand:
- Garlic press: Essential for easily crushing garlic cloves to maximize flavor.
- Mixing bowl: To combine all your ingredients smoothly.
- Whisk or spoon: For mixing the aioli until it’s creamy and well-combined.
- Measuring spoons: To ensure you get the right amounts of each ingredient.
Small-batch Garlic Aioli: From Prep to Plate

Creating your Small-batch Garlic Aioli is a breeze. Follow these simple steps:
Step 1: Gather Your Ingredients
Start by gathering all your ingredients on the countertop. This will make the preparation process quick and efficient.
Step 2: Press the Garlic
Using your garlic press, crush the garlic clove until it’s finely minced. This step is crucial as it releases the full flavor of the garlic.
Step 3: Combine the Ingredients
In a mixing bowl, add the mayonnaise, pressed garlic, lemon juice, salt, and pepper.
Step 4: Whisk It Together
Using a whisk or a spoon, mix everything together until you achieve a smooth, creamy consistency. Taste and adjust seasoning if necessary.
Step 5: Chill and Serve
For the best flavor, let your aioli chill in the refrigerator for at least 30 minutes before serving. This allows the flavors to meld beautifully.
International Equivalents
If you’re cooking across borders, you may want to know how Small-batch Garlic Aioli translates in other cuisines:
- Spanish: Alioli
- Italian: Aïoli (often used with seafood)
- French: Aïoli (a traditional garlic mayonnaise)
- Middle Eastern: Toum (a garlic sauce with similar ingredients)
Mistakes That Ruin Small-batch Garlic Aioli
Creating the perfect Small-batch Garlic Aioli is all about balance and technique. Here are some common pitfalls to avoid:
- Using pre-minced garlic: Fresh garlic is essential for the best flavor.
- Skipping the chill time: Allowing the aioli to rest enhances the flavor.
- Overmixing: While you want it creamy, overmixing can cause it to become too thin.
- Not tasting: Always taste your aioli before serving to adjust the seasoning.
Refrigerate, Freeze, Reheat
To store your Small-batch Garlic Aioli, follow these guidelines:
- Refrigerate: Store in an airtight container for up to one week.
- Freeze: While it’s best fresh, you can freeze aioli for up to a month. Thaw in the fridge before using.
- Reheat: Aioli is typically served cold, so there’s no need to reheat. Just give it a good stir after chilling.
Common Qs About Small-batch Garlic Aioli
Can I use Greek yogurt instead of mayonnaise?
Yes, Greek yogurt can be a healthier alternative, providing a tangy flavor while still maintaining creaminess.
What can I serve with garlic aioli?
This aioli pairs wonderfully with grilled vegetables, seafood, sandwiches, or as a dip for fries. You might also enjoy it with Garlic Butter Shrimp Scampi With Toasted Breadcrumbs.
How can I make a spicy version?
Add a dash of hot sauce or a pinch of cayenne pepper to the aioli for an extra kick!
Can I make aioli without eggs?
Yes! This recipe uses mayonnaise, which is egg-based, but you can also find vegan mayonnaise options if you prefer an egg-free version.
Looking to expand your culinary skills? Here are some delicious recipes to try alongside your :
See You at the Table
After preparing your Small-batch Garlic Aioli, gather your friends and family around the table. This sauce is not just a condiment; it’s a conversation starter, a flavor enhancer, and a culinary delight that brings people together. Whether you’re enjoying a simple dinner or hosting a festive gathering, this aioli is sure to impress.
Now, roll up your sleeves and get ready to indulge in a flavor-packed experience that you’ll want to recreate time and again. Happy cooking!
Small-batch Garlic Aioli
Ingredients
Equipment
Method
- Step 1: Gather Your Ingredients - Start by gathering all your ingredients on the countertop. This will make the preparation process quick and efficient.
- Step 2: Press the Garlic - Using your garlic press, crush the garlic clove until it’s finely minced. This step is crucial as it releases the full flavor of the garlic.
- Step 3: Combine the Ingredients - In a mixing bowl, add the mayonnaise, pressed garlic, lemon juice, salt, and pepper.
- Step 4: Whisk It Together - Using a whisk or a spoon, mix everything together until you achieve a smooth, creamy consistency. Taste and adjust seasoning if necessary.
- Step 5: Chill and Serve - For the best flavor, let your aioli chill in the refrigerator for at least 30 minutes before serving. This allows the flavors to meld beautifully.
Notes
- Fresh garlic is key for the best flavor.
- Let the aioli chill for at least 30 minutes for optimal taste.
- Store in an airtight container in the fridge for up to one week.