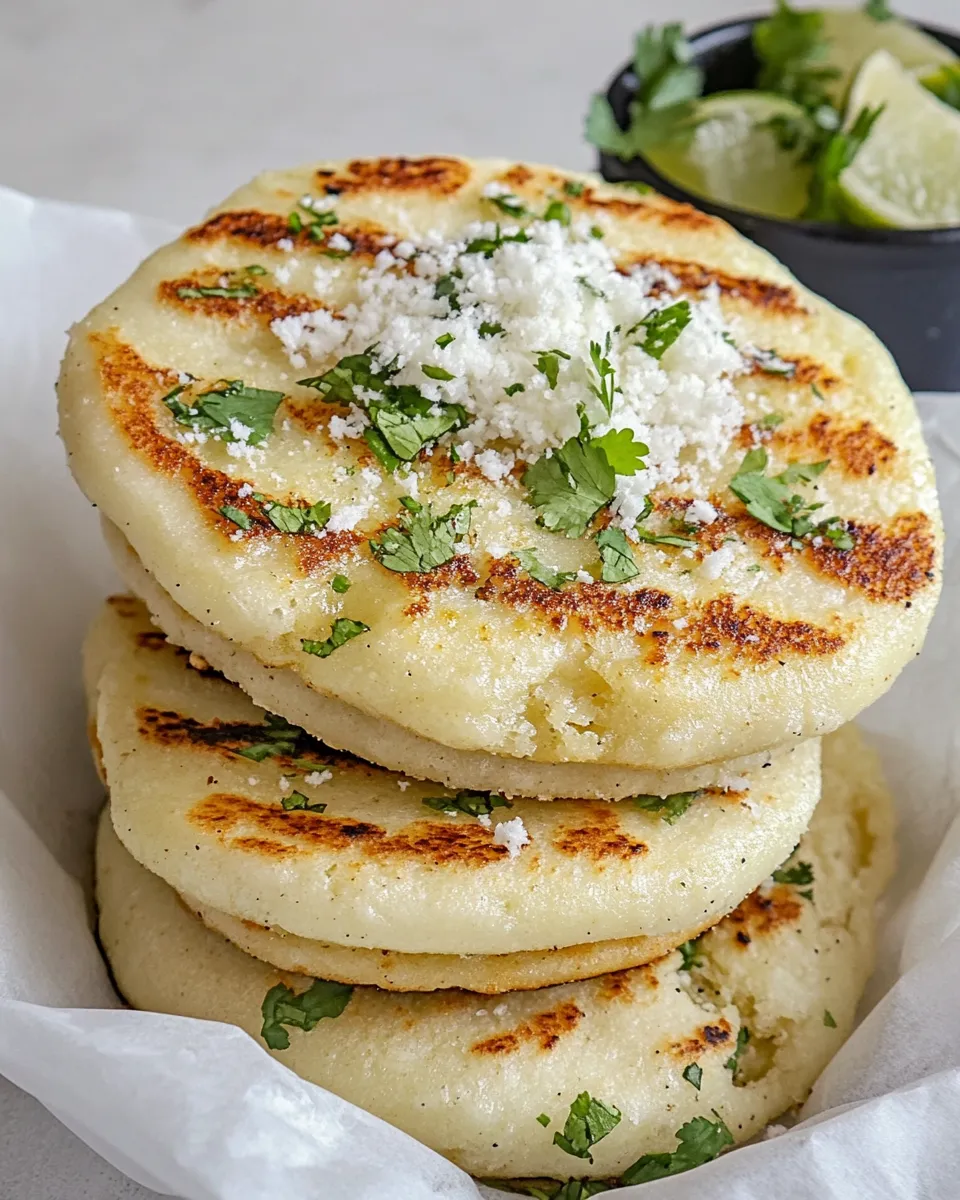
Arepas are a delicious staple of Venezuelan and Colombian cuisine that have taken the culinary world by storm. These cornmeal cakes are incredibly versatile, making them a perfect canvas for a variety of fillings. Whether you’re looking to create a savory dish with shredded chicken and avocado or a vegetarian delight, homemade arepas will surely impress your family and friends. Plus, they’re surprisingly easy to make!
Reasons to Love Homemade Arepas

Homemade arepas are not just tasty; they are also a wonderful way to bring people together. Here are a few reasons to fall in love with this dish:
- Versatile: Fill them with anything from meats to veggies to cheeses!
- Quick and Easy: With just a few ingredients, you can whip up a delicious meal in no time.
- Customizable: You can tweak the flavors to suit your taste preferences or dietary needs.
- Family-Friendly: Kids love them, and they can even help in the kitchen!
- Great for Meal Prep: Prepare a batch and enjoy throughout the week.
Ingredient Checklist
To make your very own homemade arepas, gather the following ingredients:
- 2 cups pre-cooked white cornmeal (P.A.N. brand or similar)
- 2 cups warm water
- 1 teaspoon salt
- 1 tablespoon vegetable oil (plus extra for cooking)
- 2 cups cooked chicken (shredded)
- 1 ripe avocado (peeled and pitted)
- ½ cup mayonnaise
- 1 small onion (finely chopped)
- ½ cup cilantro (finely chopped)
- 1 jalapeño (seeded and finely chopped, optional)
- Juice of 1 lime
- Salt and pepper (to taste)
Essential Tools for Success
Before you dive into making homemade arepas, ensure you have these essential tools:
- Mixing Bowl: For combining your arepa dough.
- Non-stick Skillet or Griddle: Ideal for cooking the arepas evenly.
- Spatula: To flip the arepas without damaging them.
- Measuring Cups and Spoons: For accurate ingredient measurements.
- Knife and Cutting Board: For chopping the filling ingredients.
Homemade Arepas, Made Easy

Follow these simple steps to create your homemade arepas:
Step 1: Prepare the Dough
In a large mixing bowl, combine the pre-cooked white cornmeal, warm water, and salt. Stir the mixture until it forms a smooth dough. Let it sit for about 5 minutes to allow the cornmeal to absorb the water.
Step 2: Shape the Arepas
Once the dough has rested, divide it into small balls, about the size of a golf ball. Gently flatten each ball into a disc, approximately ½ inch thick.
Step 3: Cook the Arepas
Heat a non-stick skillet or griddle over medium heat and add a little vegetable oil. Place the arepas in the skillet and cook for about 5-7 minutes on each side, or until they are golden brown and slightly crispy.
Step 4: Prepare the Filling
While the arepas are cooking, combine the shredded chicken, chopped onion, cilantro, jalapeño (if using), mayonnaise, lime juice, salt, and pepper in a bowl. Mix well to ensure all ingredients are evenly distributed.
Step 5: Assemble the Arepas
Once the arepas are cooked, slice them open, like a pocket, and stuff them with the chicken mixture and slices of avocado.
Season-by-Season Upgrades
Homemade arepas can easily adapt to different seasons and occasions. Here are some ideas to elevate your arepas:
- Spring: Add fresh herbs like dill or mint for a refreshing twist.
- Summer: Incorporate grilled corn or zucchini into the filling.
- Fall: Try a spiced pumpkin filling or roasted butternut squash.
- Winter: Fill with hearty, warm ingredients like beef stew or cheese.
Missteps & Fixes
Even the most experienced cooks can run into issues when making homemade arepas. Here are some common missteps and how to fix them:
- Too Dry: If your dough is crumbly, add a little more warm water until the texture is smooth.
- Too Wet: If your dough is sticky, sprinkle in a bit more cornmeal.
- Burnt Arepas: Ensure your heat is medium, and keep an eye on the cooking time to avoid burning.
- Filling Leaks: Make sure the arepas are sealed well before cooking to prevent spills.
Meal Prep & Storage Notes
Homemade arepas are perfect for meal prep! Here are some tips for storing and reheating:
- Storage: Keep cooked arepas in an airtight container in the fridge for up to 3 days.
- Freezing: Freeze uncooked arepas separated by parchment paper for up to a month.
- Reheating: Reheat cooked arepas in a skillet over medium heat until warmed through and crispy again.
Ask & Learn
Can I make arepas without chicken?
Absolutely! You can fill arepas with a variety of ingredients such as beans, cheese, or grilled vegetables for a vegetarian option.
What other fillings can I use?
Some popular fillings include shredded beef, pulled pork, or a mix of sautéed peppers and onions. You can even use cheese enchiladas as a filling for a cheesy delight!
Can I use yellow cornmeal instead?
Yes, you can use yellow cornmeal, but the texture and flavor may differ slightly from traditional white cornmeal arepas.
How do I know when my arepas are done cooking?
Arepas are done when they are golden brown and sound hollow when tapped. You can also check for a slight crust on the outside.
Looking for more culinary adventures to enjoy over the weekend? Check out these ideas:
Let’s Eat
Now that you’ve mastered the art of making homemade arepas, it’s time to dig in! These delicious cornmeal cakes are sure to become a staple in your kitchen. With their endless possibilities for fillings and flavors, you can enjoy them any day of the week. So gather your ingredients, invite some friends over, and enjoy the delightful experience of homemade arepas together. Happy cooking!
Homemade Arepas
Ingredients
Equipment
Method
- Step 1: Prepare the Dough - In a large mixing bowl, combine the pre-cooked white cornmeal, warm water, and salt. Stir the mixture until it forms a smooth dough. Let it sit for about 5 minutes to allow the cornmeal to absorb the water.
- Step 2: Shape the Arepas - Once the dough has rested, divide it into small balls, about the size of a golf ball. Gently flatten each ball into a disc, approximately ½ inch thick.
- Step 3: Cook the Arepas - Heat a non-stick skillet or griddle over medium heat and add a little vegetable oil. Place the arepas in the skillet and cook for about 5-7 minutes on each side, or until they are golden brown and slightly crispy.
- Step 4: Prepare the Filling - While the arepas are cooking, combine the shredded chicken, chopped onion, cilantro, jalapeño (if using), mayonnaise, lime juice, salt, and pepper in a bowl. Mix well to ensure all ingredients are evenly distributed.
- Step 5: Assemble the Arepas - Once the arepas are cooked, slice them open, like a pocket, and stuff them with the chicken mixture and slices of avocado.
Notes
- Store cooked arepas in an airtight container in the fridge for up to 3 days.
- Freeze uncooked arepas separated by parchment paper for up to a month.
- Reheat cooked arepas in a skillet over medium heat until warmed through and crispy again.